

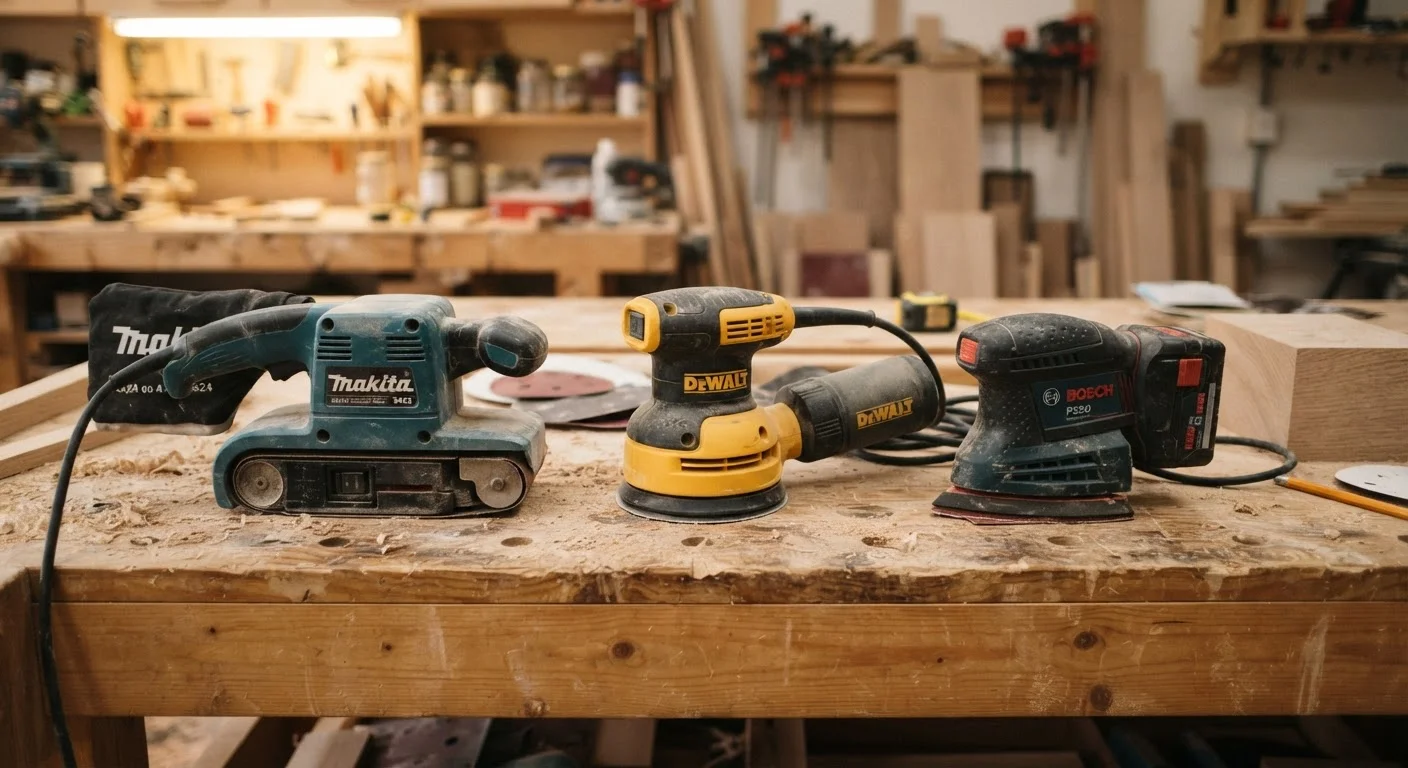
The Belt Sander: Raw Power for Heavy Work
A belt sander drives a continuous loop of sandpaper around two rollers, creating a fast, linear abrading action. Of the three common types, it removes material most aggressively - which is exactly what makes it both powerful and demanding to control.
Belt sanders are best used for:
- Leveling rough lumber that has cupping, mill marks, or major surface irregularities
- Stripping old paint or finish from large flat surfaces such as floors, doors, or wide boards
- Removing significant material quickly, such as trimming a door edge that sticks
The trade-off is control. A belt sander held in one spot for even a few extra seconds can create a noticeable dip in wood. Always keep it moving in the direction of the grain, maintain light, even pressure, and never tilt the tool on its edge - that concentrates force and causes gouging. Belt sanders are generally not the right choice for finishing work or delicate surfaces.
Keep the Belt Sander Moving
Never let a belt sander sit stationary on a surface while it's running - it will cut a visible depression in seconds. Practice on scrap wood first to get a feel for how quickly it removes material. Light, consistent, overlapping passes in the direction of the grain give the best results.
The Random Orbital Sander: The DIYer's Workhorse
A random orbital sander spins a round pad while simultaneously moving it in a small, random elliptical pattern. This dual motion prevents the abrasive from cutting in a single repeated direction, which is why it leaves far fewer visible swirl marks than older orbital designs.
This is the sander most DIYers should reach for first. It handles a wide range of tasks competently:
- Preparing bare wood for paint or stain
- Scuff-sanding between coats of paint, primer, or polyurethane
- Light stock removal on smaller pieces
- Final smoothing before finishing
Random orbitals accept hook-and-loop (Velcro-style) sanding discs in standard sizes, making grit changes fast. Their round pad limits reach into tight corners, but for open, flat, and gently curved surfaces, they deliver reliable results with a low learning curve.
60-220+
Sandpaper grit range for typical DIY projects
Lower numbers (60-80) handle aggressive material removal; 120-180 suits general prep; 220 and above delivers a fine pre-finish surface.
~5 in
Standard random orbital pad diameter
The 5-inch disc is the most common size, with hook-and-loop attachment making grit changes quick and tools widely compatible with aftermarket discs.
The Detail Sander: Precision in Tight Spaces
Also called a mouse sander or triangle sander, the detail sander uses a small triangular pad that oscillates rapidly - typically back and forth rather than rotating. The pointed tip is the defining feature: it fits into corners, along molding profiles, and into carved recesses that a round or rectangular pad simply cannot reach.
Detail sanders are not fast material removers. Their small pad surface area limits how quickly they can work, and they are underpowered for large jobs. Think of them as a finishing and touch-up tool rather than a primary workhorse.
Where they shine:
- Sanding window sash corners and door frame trim
- Cleaning up edges on furniture joints after assembly
- Refining decorative molding that a larger pad would skip over
Many detail sanders accept standard sandpaper cut to fit, or purpose-made hook-and-loop triangular sheets. Some models also accept accessory pads for scraping or polishing - useful when working on restoration projects.
Choosing the Right Sander for Your Project
In practice, most home workshops benefit from owning at least a random orbital sander and a detail sander. The belt sander is a specialty tool worth having if you regularly work with rough lumber or refinish large surfaces - otherwise it can sit idle for long stretches.
Dust and Safety Apply to All Three
All power sanders produce fine airborne dust that poses a real respiratory risk, and wood dust is classified as a potential carcinogen with prolonged exposure. Always work with dust collection connected and wear a properly rated respirator or N95 dust mask - not just a paper dust mask. Eye protection is also essential, as fine particles travel unpredictably.
A practical decision framework:
| Task | Best Sander |
|---|---|
| Stripping paint from a large flat surface | Belt sander |
| Leveling a rough wood panel | Belt sander |
| General wood prep and smoothing | Random orbital |
| Between-coat scuff sanding | Random orbital |
| Sanding interior corners and trim | Detail sander |
| Touching up furniture joints | Detail sander |
Whatever sander you use, progressing through grits - rather than jumping from coarse to very fine - produces a noticeably cleaner surface. The grit sequence is just as important as the tool itself.
Frequently Asked Questions
Generally, no. Belt sanders are aggressive and will remove finish quickly and unevenly on delicate pieces. A random orbital sander at a higher grit is safer for stripping or scuff-sanding finished furniture without gouging the wood.
Start with a lower grit (60-80) to remove old finish or level rough surfaces, then progress to 120, then 180-220 for a smooth final surface. Skipping grits can leave visible scratches in the final finish.
No. A standard orbital sander moves in a fixed square or circular pattern, which can leave swirl marks. A random orbital sander combines rotation with a random oscillation, significantly reducing visible scratch patterns for a cleaner result.
Yes - fine sanding dust is a respiratory hazard and a fire risk. Most sanders have built-in dust ports; connect a shop vacuum or use the onboard dust bag. Always wear an appropriate dust mask rated N95 or better.
Not effectively. Detail sanders have small pads and lower power, making them slow for large flat surfaces. They excel at tight spots but are not a practical substitute for general surface preparation.
Always wear safety glasses and a properly rated dust mask. Secure your workpiece so it cannot shift. Keep the sander moving to avoid burning or gouging the surface. Disconnect power before changing sandpaper.
The content on this site is for informational purposes only and is not a substitute for professional advice. Always consult a qualified professional for guidance specific to your situation.