

Why Not All Updates Are Created Equal
Every room has a hierarchy of visual weight - surfaces your eye lands on first, architectural details it registers next, and smaller accents it processes last. Spending money at the bottom of that hierarchy before addressing the top is one of the most common and costly DIY sequencing mistakes.
This ranked list works through updates from highest to lowest visual return, based on how much surface area or perceptual weight each change commands. If you're working with a limited budget, treat the order here as a guide to prioritization, not just inspiration. For a structured way to audit what's actually holding your space back, run through this room audit checklist before you spend a dollar.
Wall Paint - The Widest Surface, the Biggest Shift
Paint covers more square footage than any other single update, which is exactly why it delivers the most dramatic before-and-after results. A gallon of quality interior paint typically runs $30-$60, and a standard bedroom requires two gallons for two coats. Total material cost: under $120 for most rooms.
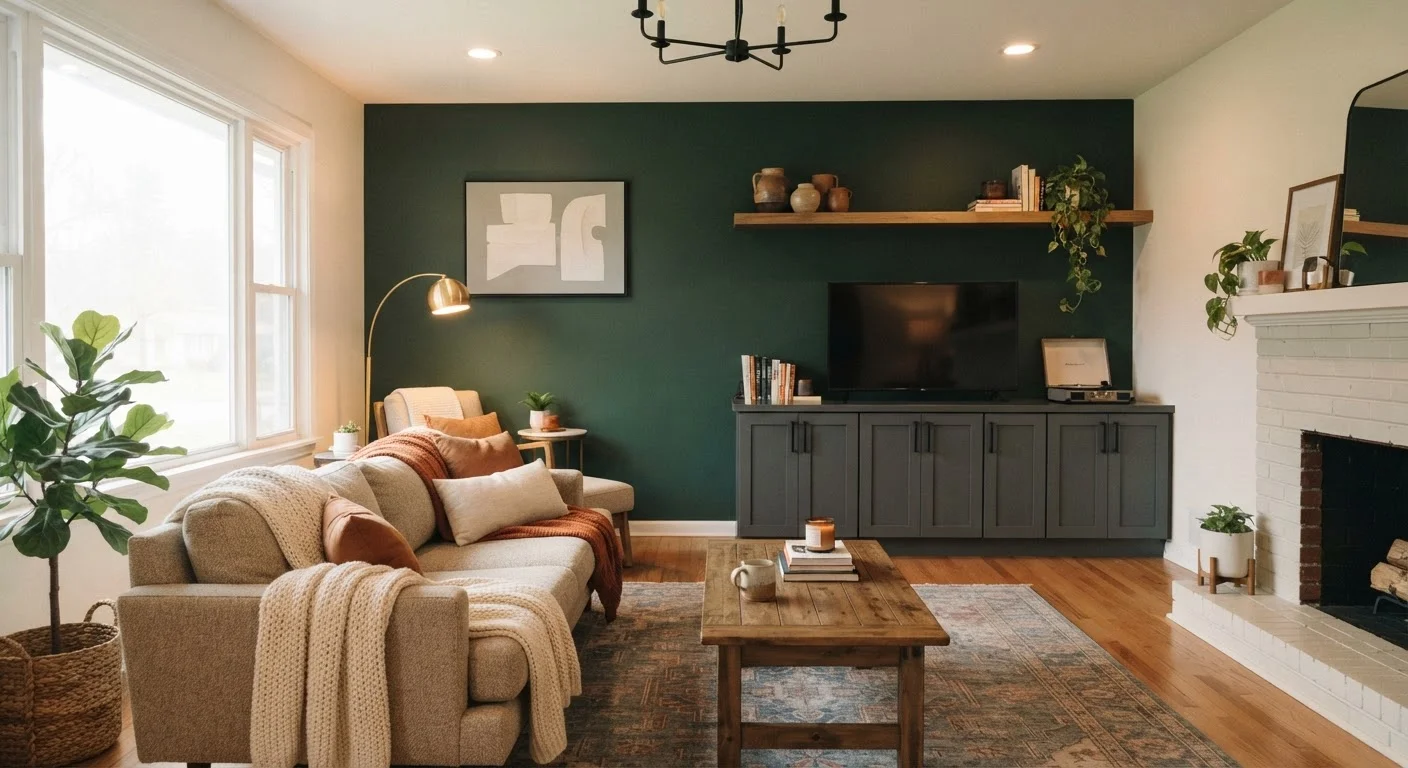
The visual return depends heavily on color strategy. A single bold accent wall (the one behind a bed or sofa) draws the eye and reframes the entire room. Deep, saturated tones on all four walls create a sense of enclosure that reads as intentional and designed. Going lighter opens up a space, though it requires cleaner prep to avoid showing imperfections. Either direction works - the mistake is staying with a color that no longer fits just to avoid the effort.
Prep is where most DIYers lose results: skip proper cleaning, priming, and edge taping and the finish will show it. Budget one to two hours of prep for every hour of painting.
Paint is the only update that transforms an entire room for under $120 in materials.
Lighting - Mood, Scale, and Perceived Quality
Overhead lighting in most homes is functional at best, punishing at worst. A single flush-mount ceiling fixture casting flat light from above flattens texture, distorts color, and makes even well-furnished rooms feel institutional.
Layered lighting - a ceiling fixture plus floor lamps, table lamps, or under-cabinet strips - solves this at a range of price points. Replacing a builder-grade ceiling fixture with a statement pendant or semi-flush mount runs $80-$250 for the fixture and is a straightforward DIY swap if a box is already in place. Important: any work involving new wiring, junction boxes, or panel connections should be handled by a licensed electrician.
Dimmer switches (typically $15-$30 each) paired with dimmable bulbs add flexibility that fundamentally changes how a room feels at different times of day. This is one of the most underused upgrades in DIY makeovers.
Layered lighting does more to change room mood than nearly any other single update.
Cabinet and Door Hardware - Small Pieces, Outsized Signal
Hardware is one of the first things people notice up close and one of the easiest things to overlook during a makeover. Outdated brass pulls, builder-grade knobs, or mismatched finishes all read as neglect - even in otherwise well-maintained kitchens and bathrooms.
A full kitchen hardware swap - 15 to 20 pulls and knobs - typically costs $60-$180 depending on style and finish. Installation requires a screwdriver and, for bar pulls, a drill with a template. Total time: two to three hours for an average kitchen. The same logic applies to interior door hardware: lever handles in a unified finish replace hollow-feeling knobs and immediately elevate perceived quality throughout a home.
Match finish to existing fixtures (faucets, light switch plates) for a pulled-together look that doesn't require replacing everything at once.
A full cabinet hardware swap costs under $180 and takes an afternoon - the return is immediate.
Flooring Updates - Ground-Level Impact
Flooring commands a significant portion of visual real estate in every room, but it's also the update with the widest cost range and the most prep dependency. Peel-and-stick vinyl plank flooring starts around $1.50-$2.50 per square foot; click-lock luxury vinyl plank runs $3-$6 per square foot installed DIY; hardwood refinishing averages $3-$5 per square foot professionally.
The visual return is high when the subfloor is level and transitions are handled cleanly. Rushed installations with visible gaps, uneven edges, or mismatched transitions undercut the result. For rooms under 200 square feet, a weekend DIY floor replacement is realistic for most skill levels. Larger areas or subfloor repairs add complexity. Weekend projects that add long-term value covers flooring alongside other high-return upgrades worth prioritizing.
Flooring delivers lasting visual impact - but prep and installation quality determine the final result.
Trim and Molding - The Detail That Signals Quality
Baseboards, door casings, and crown molding function like picture frames - they finish what's already there and signal whether a space was done with care. Rooms with flat, painted trim in good condition look complete. Rooms with chipped, yellowed, or absent trim look unfinished regardless of what else is updated.
Repainting trim is the cheapest intervention: a quart of semi-gloss trim paint runs $15-$25 and covers most rooms in a single coat. Replacing flat stock baseboards with taller, more detailed profiles runs $1-$3 per linear foot for the material and involves basic miter cuts. Adding simple crown molding in a small room can be completed over a weekend with a miter saw and construction adhesive, though corners require patience to get right.
This update rarely photographs dramatically, but it's consistently cited as one of the details that separates a polished room from a merely refreshed one.
Trim paint is a $20-$25 quart of paint that makes a room look professionally finished.
Window Treatments - Proportion, Privacy, and Softness
Bare windows or short, narrow curtain panels are among the most common visual mistakes in DIY-decorated rooms. Hanging curtain rods close to the ceiling (rather than just above the window frame) and extending them 6-12 inches beyond the frame on each side makes windows appear significantly larger and ceilings taller.
Curtain panels in neutral linen or cotton weaves are widely available in the $25-$60 range per panel. The rod, brackets, and rings add another $20-$50. The total investment for a living room window runs $100-$200 and involves a drill, a level, and about an hour. The transformation in scale and softness is immediate - especially in rooms where hard surfaces (wood, tile, painted drywall) dominate. Practical room styling ideas can help you tie treatments into a broader decor approach.
Curtains hung near the ceiling - not the window frame - make any room feel taller and larger.
Furniture Arrangement - Zero Cost, Genuine Impact
Before buying anything, consider whether the room's current layout is working against it. Furniture pushed against walls, traffic paths that bisect seating areas, and undersized rugs anchoring nothing are spatial problems that no amount of new decor fixes.
Pulling seating away from walls and arranging it around a defined anchor point (a rug, a coffee table, a fireplace) creates a sense of intentional composition. This is free, reversible, and often more transformative than any single purchase. Furniture arrangement strategies walks through the spatial principles in detail if you're not sure where to start.
Rearranging furniture is free and often more visually impactful than any single purchase.
Stack Your Budget Where the Eye Goes First
These updates aren't equal in complexity or cost, but they are equal in one way: each one works on what the eye actually notices. A room can look renovated without a single structural change if you address walls, light, and key surfaces in the right order.
If you're figuring out what a realistic budget unlocks at each tier, this budget breakdown by spend range offers a grounded comparison. And if you've started a refresh but lost momentum, understanding why makeovers stall can help you get back on track. Tackle the high-return items first - the rest tends to fall into place.
Sequence Matters as Much as Budget
Always update walls and floors before replacing hardware or adding decor. New paint next to old, scuffed trim looks worse than before - and hardware installed over unfinished surfaces gets covered in paint. Working from large surfaces inward saves rework and keeps results looking intentional.
The content on this site is for informational purposes only and is not a substitute for professional advice. Always consult a qualified professional for guidance specific to your situation.