

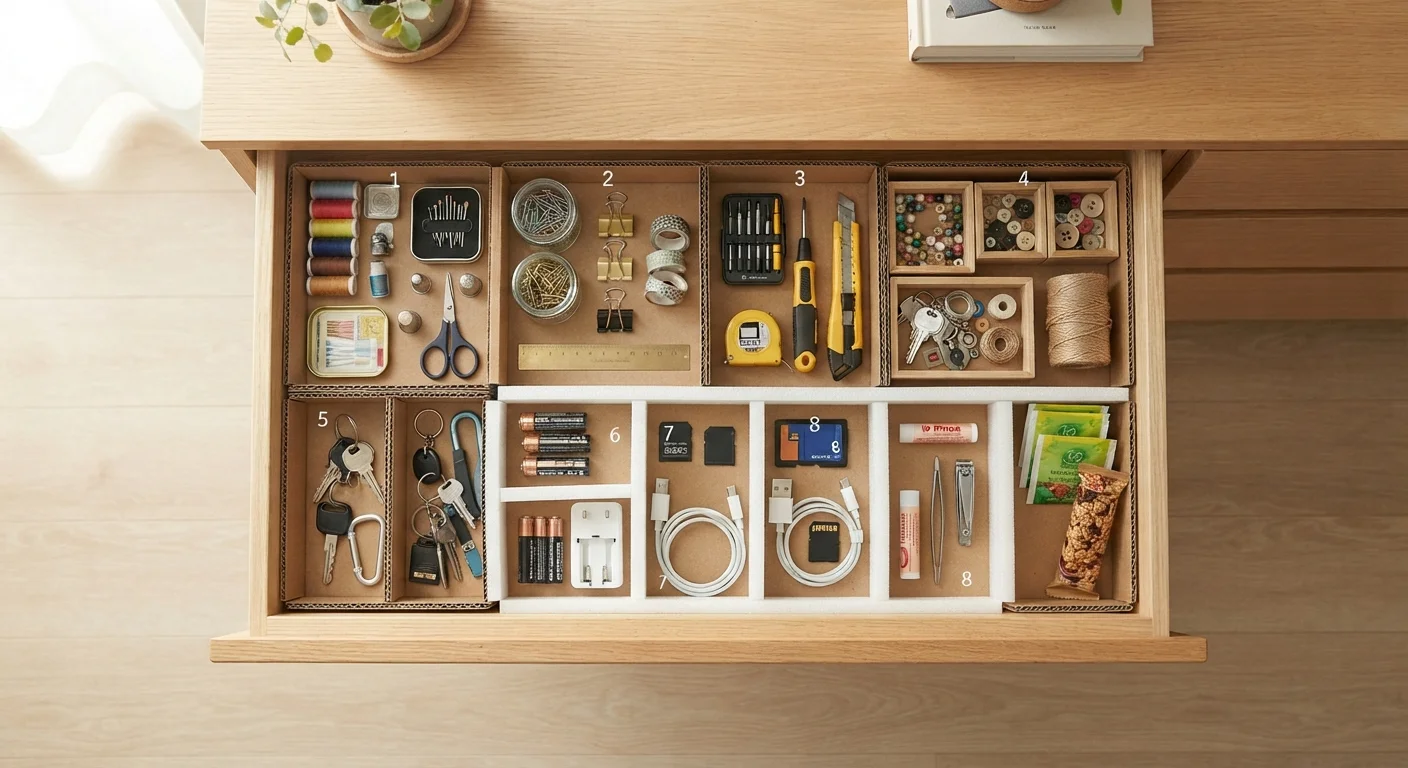
Option A
Cardboard
The free, familiar workhorse of DIY organization.
Best for: Quick, temporary dividers using materials you already have at home.
Option B
Foam Board
The lightweight upgrade with a cleaner, more durable finish.
Best for: Longer-lasting dividers with a polished look and better moisture resistance.
Cutting, Fitting, and Assembly
Both cardboard and foam board use the same core construction method: measure the drawer interior, cut strips to the drawer's depth, then notch each strip halfway through at intervals so they slot together into an interlocking grid. No adhesive is strictly necessary, though a few dabs of hot glue can lock intersections in place.
Where they diverge is in the cutting experience. Cardboard - particularly double-wall corrugated from shipping boxes - requires firm, repeated strokes with a utility knife or box cutter, and the edges often compress or tear slightly. A metal ruler and a self-healing cutting mat make a significant difference in keeping cuts straight. Thin chipboard from cereal boxes is easier to cut cleanly but offers less structural height.
Foam board (typically a polystyrene core sandwiched between paper facing layers, sold in craft and office supply stores) cuts cleanly in a single confident pass with a sharp blade. The result is a crisp, flat edge that sits flush against the drawer wall. Because the material doesn't compress, the slots interlock snugly without any gap-filling tricks.
For a decorative finish on either material, wrapping strips in kraft paper, washi tape, or lightweight fabric before assembly significantly improves both appearance and edge durability. See our guide to fabric-wrapped storage boxes for adhesive and corner techniques that transfer directly to divider strips. You might also find inspiration in our roundup of household items that double as organizer components.
| Criterion | Cardboard | Foam Board |
|---|---|---|
| Cost | Free (repurposed boxes) | ~$1-$4 per sheet |
| Ease of cutting | Moderate - multiple passes needed | Easy - one clean pass |
| Edge quality | Can fray or compress | Crisp and smooth |
| Moisture resistance | Low - softens with humidity | Moderate - core resists absorption |
| Longevity in daily-use drawers | Months before weakening | Years with normal use |
| Weight | Light | Very light |
| Best use case | Prototyping or temporary setups | Permanent, polished dividers |
Durability and Long-Term Performance
This is where the two materials pull apart most noticeably. Cardboard absorbs ambient moisture - particularly in kitchen and bathroom drawers - and begins to soften, warp, and compress at stress points within months of regular use. Heavier items like batteries, tools, or cutlery accelerate this process. The dividers may still function, but they lose their upright rigidity and start to lean or collapse.
Foam board is not waterproof, but its polystyrene core does not absorb moisture the way paper-pulp cardboard does. In a utensil drawer that gets wiped out occasionally or a bathroom drawer exposed to humidity, foam board holds its shape considerably longer. Surface scuffs are minor and don't affect structural integrity.
That said, foam board is not indestructible. Sharp or heavy objects can gouge the core, and very tall divider strips can bow under lateral pressure if they aren't supported at regular intervals. Keeping divider strips no taller than the drawer sidewalls and slotting them at no more than 3-inch intervals prevents most bowing.
~$0
Cost of cardboard dividers from repurposed boxes
Shipping and cereal boxes are the most common free source; most households accumulate enough material for several drawers monthly.
~30 min
Typical build time for a basic divider grid
A standard kitchen junk drawer with six to eight compartments can be fitted with interlocking cardboard or foam board strips in roughly half an hour.
3-5x
Estimated lifespan advantage of foam board over cardboard
In everyday drawer conditions, foam board dividers typically outlast uncoated cardboard by several times before showing structural wear.
A practical middle path: use cardboard to prototype your divider layout and confirm spacing works for your specific items, then transfer those measurements to foam board for the permanent version. This approach wastes nothing and ensures your final build fits perfectly on the first cut.
The content on this site is for informational purposes only and is not a substitute for professional advice. Always consult a qualified professional for guidance specific to your situation.