

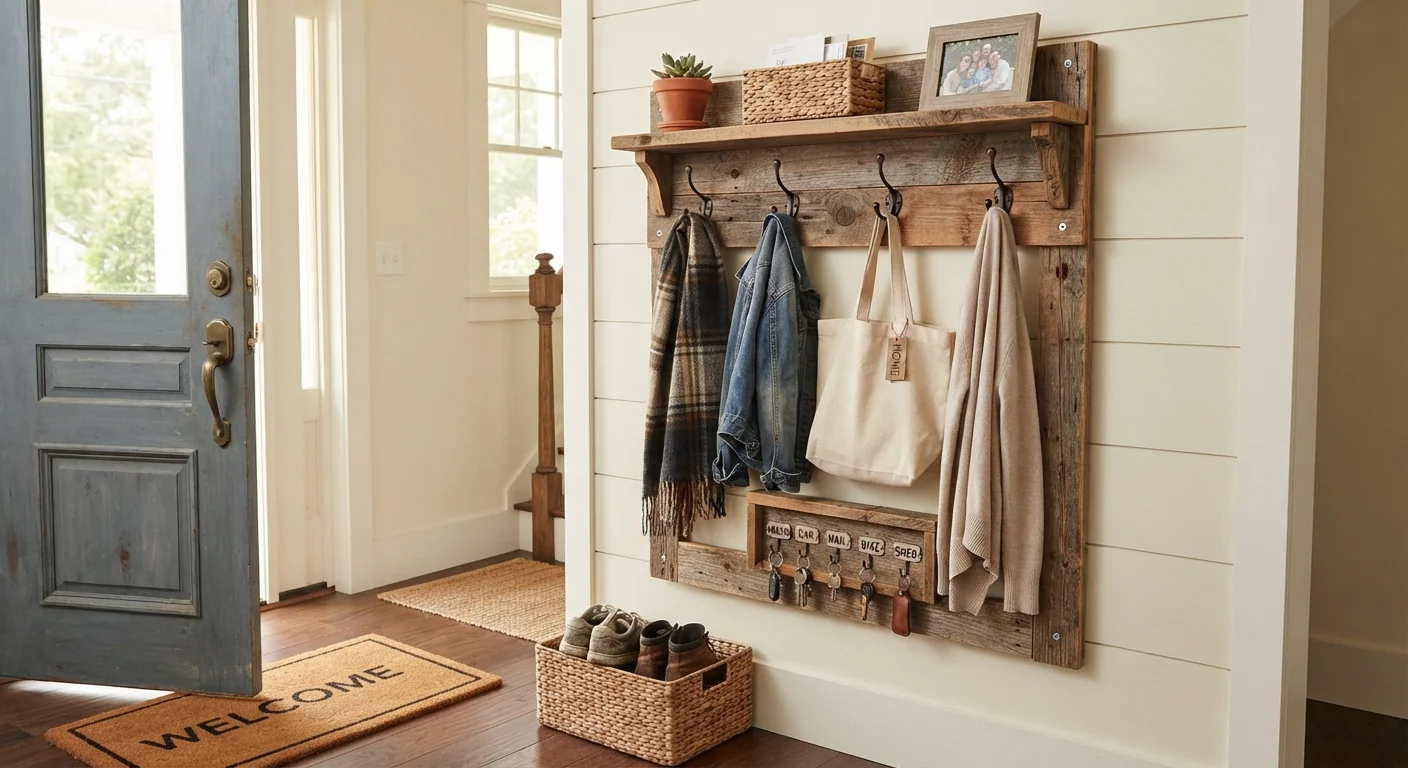
Why Scrap Wood Is Perfect for This Project
Entryways are high-traffic zones that tend to collect clutter - dropped keys, tangled bags, and coats draped over whatever surface is closest. A wall-mounted organizer solves this, and scrap wood makes it surprisingly affordable. Offcuts from previous projects, reclaimed boards, or even pallets (sanded smooth and checked for splinters) are all viable starting points.
The organizer in this guide consists of three components: a horizontal back board that anchors everything to the wall, a narrow front shelf for small items, and a row of hooks below for coats and bags. A small key rack - just a strip of wood with cup hooks - rounds it out. If you're brand new to building storage, the beginner's guide to DIY organizer projects covers foundational skills worth reviewing first.
Before cutting anything, work through this pre-build planning checklist to confirm your wall type, stud locations, and material quantities. A few minutes of planning prevents the most common frustrations.
What you will need
Tools and Materials You'll Need
This project requires only basic hand or power tools. Gather everything before you start so you're not stopping mid-build to hunt for a drill bit.
Drill and drill bits
Used to pre-drill holes, drive screws, and mount the organizer to the wall.
Miter saw or hand saw
Cuts boards to the lengths you need for the back board, shelf, and key rack strip.
Measuring tape and pencil
Marks accurate cut lines and screw placement so components align correctly.
Stud finder
Locates wall studs so the organizer can be anchored securely rather than into drywall alone.
Sandpaper (80 and 120 grit)
Smooths rough scrap wood surfaces and edges before finishing.
Wood screws (1½ inch and 2½ inch)
Shorter screws join wood components together; longer screws reach into wall studs.
Coat hooks and cup hooks
Coat hooks mount to the back board for bags and outerwear; cup hooks attach to the key rack strip.
Paint, stain, or clear sealer
Protects the wood and gives the finished organizer a clean, intentional appearance.
For wood, aim for pieces that are at least ¾ inch thick - thinner boards flex and don't hold screws reliably. Common lumber dimensions that work well: a 1×6 for the back board, a 1×3 or 1×4 for the shelf, and a 1×2 or 1×3 strip for the key rack. You can also find creative substitutes - unexpected household items that work as organizer components covers alternatives like wooden crates that may already be on hand.
Step-by-Step Build and Installation
Follow these steps in order. Each one builds on the last, so skipping ahead can create alignment or anchoring problems that are harder to fix later. For broader context on how this project fits into a room-by-room organization strategy, see DIY Organisers from Start to Finish.
Cut all boards to length
Decide on your finished width - 24 to 36 inches is practical for most entryways. Cut the back board, shelf board, and key rack strip to that same width so everything aligns flush. Label each piece with a pencil so you don't confuse them during assembly.
Sand and finish all pieces
Sand each board starting with 80-grit paper to remove rough spots, mill marks, and any raised grain on reclaimed wood. Follow with 120-grit for a smoother surface. Wipe away dust with a damp cloth and allow to dry fully. Apply your chosen finish - paint, stain, or clear sealer - and let it cure completely before assembly. Finishing before assembly is much easier than working around hooks and corners afterward.
Attach the shelf to the back board
Position the shelf board along the top front edge of the back board, flush at the top. Pre-drill two or three pilot holes through the back board into the shelf edge - pilot holes prevent splitting in narrow boards. Drive 1½-inch screws through the pilot holes to join the two pieces. Check that the shelf sits level and square before the screws are fully tightened.
Mount coat hooks and the key rack strip
Space coat hooks evenly across the lower portion of the back board - three to five hooks typically work well for a 30-inch-wide organizer. Pre-drill pilot holes for each hook's mounting screws, then drive the screws snug. For the key rack, screw the small strip of wood below the coat hooks or to the underside of the shelf, then twist in cup hooks by hand, spacing them about 2 inches apart.
Locate studs and mark the wall
Use a stud finder to locate at least two studs within your planned mounting area. Mark each stud centerline lightly with a pencil. Hold the assembled organizer against the wall at your desired height and transfer the stud marks onto the back board. These marks show exactly where your long mounting screws need to go.
Mount the organizer to the wall
With a helper holding the organizer in position, pre-drill through the back board at your stud marks. Drive 2½-inch screws through the back board and into the studs. Use a level to confirm the organizer is straight before driving the final screw fully home. Give the unit a firm tug downward and sideways to confirm it's secure before loading it with items.
The content on this site is for informational purposes only and is not a substitute for professional advice. Always consult a qualified professional for guidance specific to your situation.