

Why Small Laundry Rooms Demand a Different Strategy
Most laundry rooms in American homes fall into one of three categories: a dedicated closet squeezed between bedrooms, a narrow room tucked beside the kitchen, or a combined utility space shared with a water heater or HVAC system. In every case, the machines themselves consume the majority of the floor plan - leaving storage as an afterthought.
The mistake most households make is treating a laundry room like a miniature version of a larger room and applying the same general storage advice. It rarely works. Instead, the goal is to identify micro-zones - the wall above the machines, the back of the door, the gap beside the dryer - and assign each one a specific job. This guide walks you through exactly that, zone by zone.
For a broader look at how this fits into whole-home organization, see our complete room-by-room framework. If you're facing the same squeeze in a neighboring room, bathroom storage on a tight timeline covers parallel strategies for confined wet spaces.
What you will need
Step-by-Step: Building Out Your Laundry Room Storage
Work through the steps below in order. Each one builds on the last, so completing them sequentially avoids backtracking and helps you avoid over-purchasing supplies before you understand what the space actually needs.
Audit and Measure Every Available Surface
Before purchasing anything, spend 15 minutes measuring and photographing the room. Record the height from the top of each machine to the ceiling, the width of the wall above and beside the appliances, and the depth of any alcove. Note the door swing direction and whether the back of the door is accessible when the door is open.
Sketch a rough floor plan on paper. Mark every zone: above machines, beside machines, door back, wall to the left and right, and any floor space beside the units. This map becomes your shopping list filter - if a product doesn't fit a specific zone on your map, skip it.
Stack Your Appliances If They Aren't Already
If you have a front-load washer and dryer sitting side by side, stacking them with a manufacturer-approved stacking kit is the single highest-impact change available in a tight laundry room. Stacking frees an entire wall - typically 27 to 30 inches wide - for shelving, cabinetry, or a folding station.
Stacking kits are specific to appliance models, so confirm compatibility before purchasing. Installation typically involves securing a bracket between the two units; follow the kit's instructions precisely, as an improperly stacked dryer is a safety hazard. If you're uncertain about the process, a licensed appliance technician can complete the installation quickly.
Install Floating Shelves or a Rail System Above the Machines
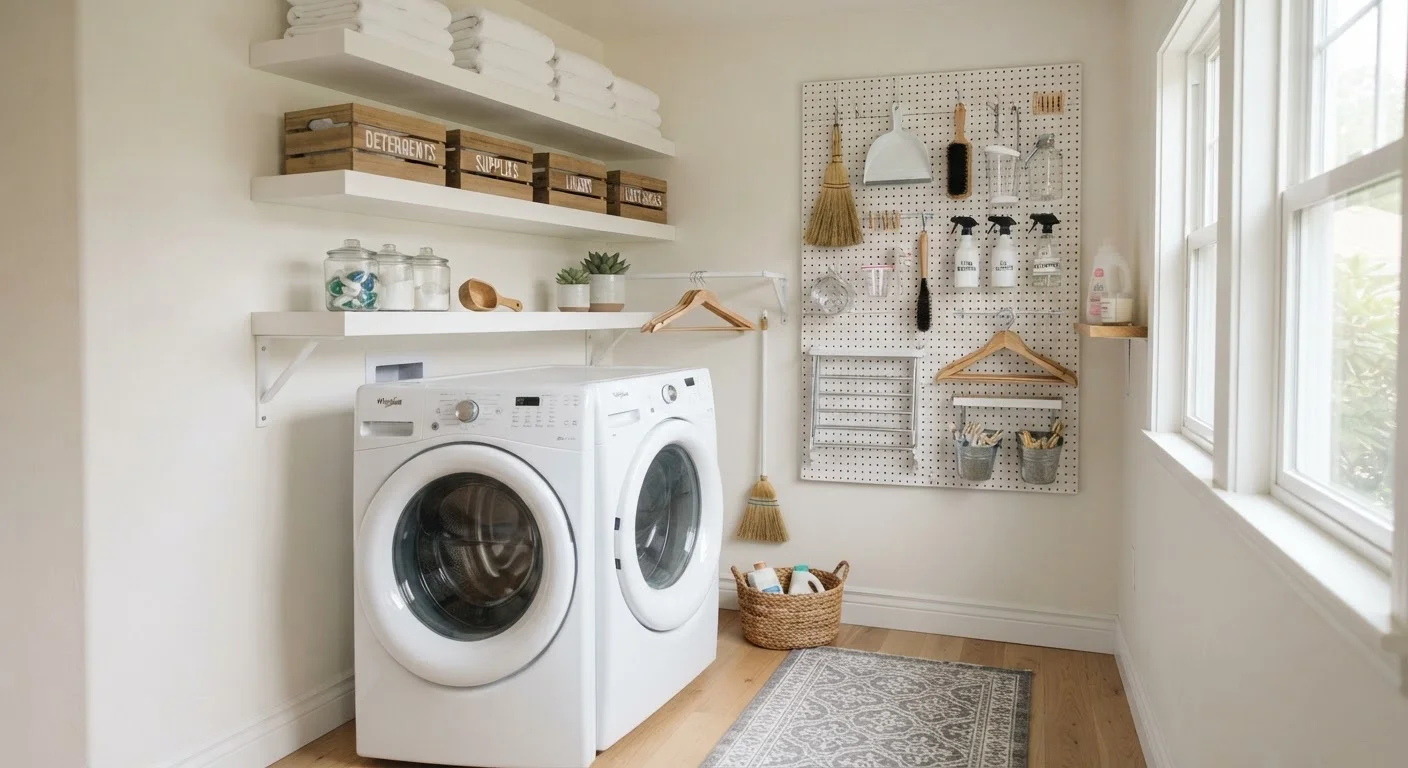
The wall above the machines is prime real estate. For a stacked unit, you may have 18-24 inches of vertical clearance to the ceiling - enough for two shelves. For side-by-side machines, a single deep shelf often fits above both units.
Use wall anchors rated for the expected load. A shelf holding detergent, dryer sheets, and a basket of supplies can easily weigh 15-20 lbs when fully stocked. Floating shelf brackets mounted into studs are the most secure option; use a stud finder before drilling. A rail-and-hook system (similar to a kitchen rail) works well if you want adjustable shelving that can be reconfigured without new holes.
Maximize the Back of the Door
An over-door organizer - either a hook-style rack or a pocket organizer - can hold dryer sheets, stain removers, small spray bottles, and lint rollers without touching wall space. Measure the door's width and the clearance between the door and the nearest shelf or wall when closed; most standard over-door units fit doors up to 1.75 inches thick.
For a more permanent option, mount a shallow pegboard or slotted panel directly to the back of the door using small standoffs. This allows custom hook configurations and holds more weight than most over-door wire units.
Use the Gap Beside the Machine
Many laundry closets and narrow rooms have a 4-8 inch gap beside one appliance - too narrow for a cabinet but wide enough for a rolling slimline tower. These towers, typically 5-7 inches wide, roll out for access and slide back flush with the machine. They're well suited for storing bottles upright, boxes of dryer sheets, or cleaning supplies.
If the gap is too narrow even for a tower, mount narrow hooks or a small magnetic strip on that side wall for hanging items like mesh laundry bags or a dryer ball bag.
Create a Folding Station If Floor Space Allows
If stacking your appliances freed a wall section, a wall-mounted fold-down table is a practical addition that takes zero floor space when not in use. These fold-flat brackets support a narrow wooden board or laminate surface, creating a temporary folding area that tucks away after use.
Alternatively, a rolling utility cart placed beside the machines serves double duty: workspace on top, storage on the shelves below. When not in use, it can roll into a closet or hallway. For DIY versions of folding stations and carts, DIY organizer projects include step-by-step builds using standard lumber.
Label Everything and Assign Zones
Once all storage elements are in place, label each shelf, bin, and container with its contents or category. Use a label maker, chalkboard labels, or even masking tape and a marker - consistency matters more than aesthetics. Assign every category a single home: detergents on the top shelf, stain treatments on the door, delicates bags on the side wall hook.
Brief other household members on the system. A storage setup only works if everyone using the laundry room knows where things belong.
Think Vertically in Every Zone
In rooms under 40 square feet, the ceiling is your best ally. Shelving that runs from machine-top height to ceiling can triple usable storage without consuming a single additional square foot of floor space. Pair upper shelves with a small step stool stored on a hook nearby so nothing becomes inaccessible.
Once your storage is functional, a few intentional styling choices - matching containers, a small plant, a framed print on the wall - can make even a utility-focused room feel considered rather than chaotic. The room styling tips hub offers quick ideas that don't require a renovation budget.
Maintaining the System Over Time
Storage solutions in laundry rooms fail most often not at installation but at the four-week mark, when everyday habits begin to override the new system. A few simple practices keep things on track.
Assign a home for every item before it enters the room. Supplies without designated spots migrate to the nearest flat surface - usually the top of the dryer - and the clutter cycle restarts. If an item doesn't have a zone, either create one or question whether it belongs in the laundry room at all.
Do a five-minute reset weekly. Return misplaced items, consolidate partially empty containers, and check that labels still match contents. This is also the right moment to spot what's running low before it runs out entirely.
Revisit the layout seasonally. Laundry needs shift - extra towels in summer, heavier fabrics in winter - and a static setup can become a poor fit. A quarterly ten-minute walk-through keeps the system matched to actual use. For ideas that translate across multiple utility spaces, DIY organizer projects offer low-cost ways to adapt your setup without starting from scratch.
The content on this site is for informational purposes only and is not a substitute for professional advice. Always consult a qualified professional for guidance specific to your situation.