

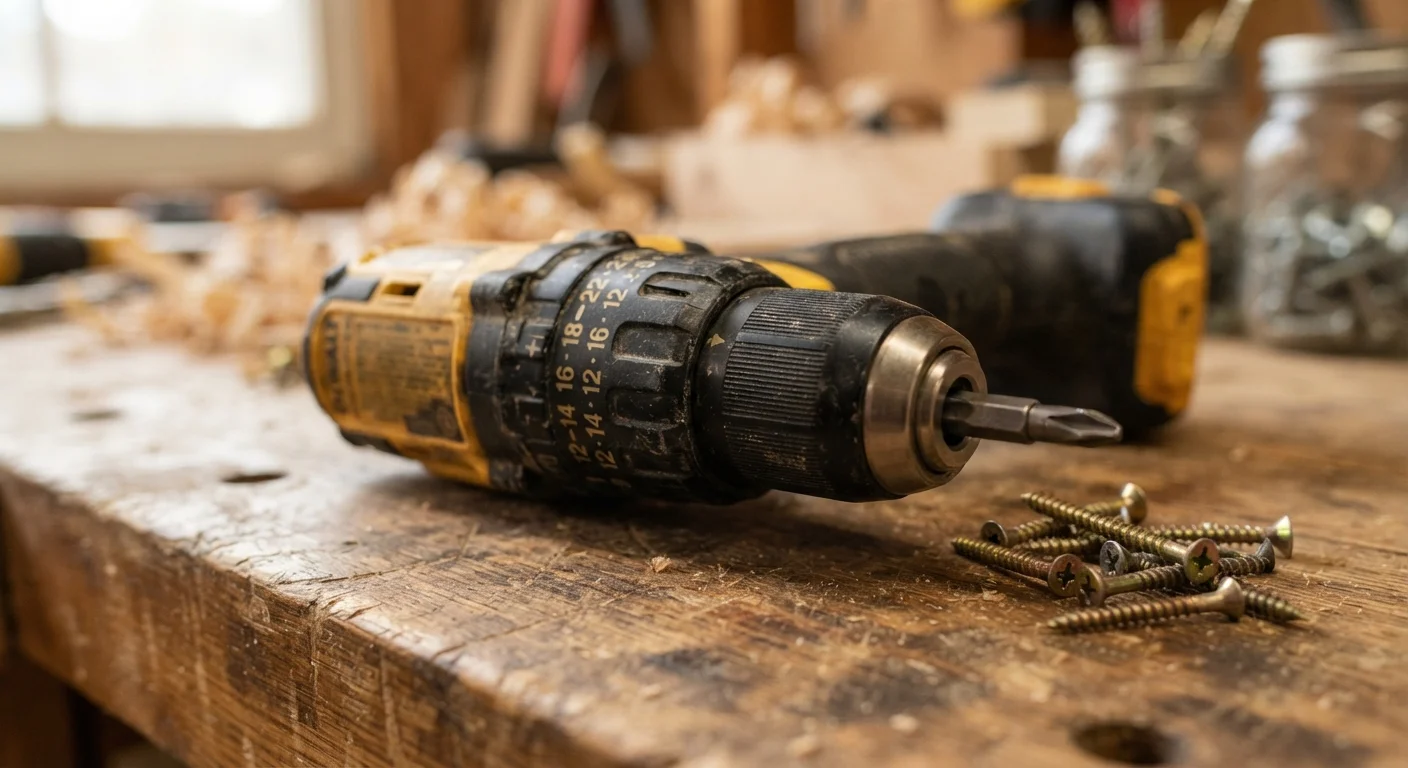
The Numbered Ring Isn't Decorative
If you've ever grabbed a cordless drill and noticed a ring behind the chuck marked with numbers like 1 through 20 - plus what looks like a drill bit icon - you've found the clutch selector. Many beginners rotate past it without a second thought, leaving it on the highest setting and wondering why their screws keep sinking too deep or tearing up the surface underneath.
The clutch exists to give you precision. Without it, a drill would deliver full power until the trigger is released - useful for boring holes, but destructive when you're seating a screw. The clutch intercepts that force and cuts the drive at a threshold you choose.
Always Test on Scrap First
Before driving screws into your actual workpiece, run a test on a scrap piece of the same material. Start at a low clutch setting and increase by one or two numbers until the screw seats flush. This takes 60 seconds and prevents costly mistakes on the real surface.
How the Clutch Actually Works
Inside the drill's gearbox, the clutch uses spring-loaded ball bearings seated in small indentations. As long as the resistance from the screw is below your set torque limit, everything spins together normally. The moment resistance exceeds that limit - meaning the screw is fully seated and the material is pushing back - the ball bearings are forced out of their detents. The gearbox slips, the clutch clicks, and the drive stops. The motor keeps running, but torque is no longer transmitted to the chuck.
Turning the clutch ring to a higher number compresses the spring more, requiring more resistance before the slip occurs. A lower number means the spring releases earlier, at a lower torque. This is why low numbers suit delicate screws in soft wood, while higher numbers are appropriate for large fasteners in hardwood or dense materials.
The drill mode - often indicated by a drill bit symbol at the top of the ring - locks the clutch out entirely. The drive stays fully engaged regardless of resistance. You need this for boring holes because a bit needs continuous, uninterrupted torque to cut cleanly.
Practical Guide: Matching the Setting to the Job
There's no chart that tells you the exact right clutch number for every situation - the settings aren't standardized across drill models. But the logic is consistent:
- Small screws in soft wood or drywall: Start at a low setting (3-5). If the screw doesn't seat fully, step up one number at a time.
- Medium screws in pine or plywood: Mid-range settings (8-12) usually work well. Test on scrap material first.
- Large screws or lag bolts in hardwood: Higher settings (15-20+) or even drill mode may be needed.
- Drilling holes (any material): Always use drill mode. Never use a numbered clutch setting when boring - the clutch may slip before you've finished the hole.
When in doubt, start low. You can always increase torque, but you can't un-strip a screw head. For more on why screws get damaged during driving, see why your drill keeps stripping screws.
Common Mistakes the Clutch Helps You Avoid
Over-driving is the most frequent beginner error - pushing a screw past flush so it either disappears into the surface or causes the material to split and crack. A properly set clutch stops the drive before that happens. This is especially important in drywall, where an over-driven screw breaks the paper facing and loses its holding strength.
Stripping screw heads is a related problem. When a screw is fully seated and the driver keeps spinning, the bit grinds out the screw's recess. The clutch prevents this by disengaging right at the point of full seating. For a deeper look at all the factors behind stripped screws, the article on drill stripping screws covers bit choice and angle as well.
It's also worth knowing how the clutch interacts with your tool choice. A standard drill/driver with a clutch behaves very differently from an impact driver, which delivers torque in rapid bursts and has no traditional clutch ring. Understanding those differences matters when choosing the right tool - see our guide on drill vs. driver vs. hammer drill for a full comparison.
1-20+
Typical clutch setting range on cordless drills
Most cordless drill/drivers offer between 15 and 25 distinct clutch positions, though the numbering and spring tension vary by manufacturer.
~30%
Screw holding strength lost when over-driven into drywall
Industry guidance from drywall installation standards notes that breaking the drywall paper face significantly reduces a screw's pull-out resistance.
Frequently Asked Questions
Start at a low setting (around 3-5) and work your way up until the screw seats flush without sinking too deep. There's no universal correct number - it depends on your screw size, material hardness, and the specific drill.
That clicking is the clutch engaging - it means the drill has reached your set torque limit and is disengaging to prevent over-driving. It's a sign the clutch is working as intended, not a sign something is wrong.
Use the drill mode when boring holes, not driving fasteners. In drill mode, the clutch is bypassed so the bit spins continuously with full torque, which is what you need for cutting through wood, metal, or masonry.
Yes. A lower clutch setting stops the drill before applying enough force to split thin or delicate wood. Combined with pre-drilling a pilot hole, this is one of the most effective ways to protect your workpiece.
Most cordless drill/drivers include a clutch, but basic corded drills sometimes do not. Impact drivers also lack a traditional adjustable clutch - they deliver torque in high-speed rotational pulses instead.
The content on this site is for informational purposes only and is not a substitute for professional advice. Always consult a qualified professional for guidance specific to your situation.