

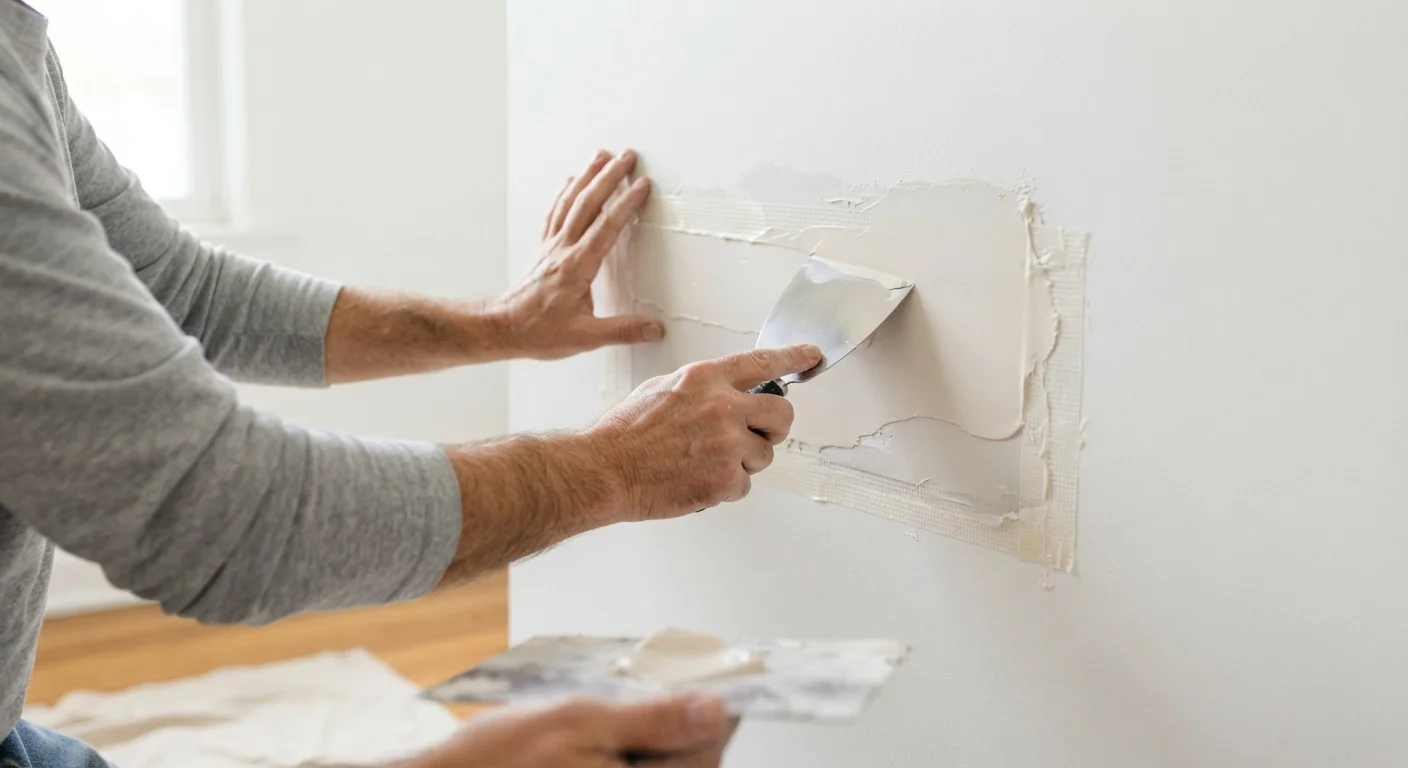
Why the California Patch Works
Most mid-size drywall holes - left by doorknobs, removed anchors, or accidental impacts - fall in an awkward size range: too large for spackle alone, yet not large enough to justify cutting back to studs and installing backing boards. The California patch, sometimes called the self-backing patch, solves this elegantly.
The trick is in how a piece of scrap drywall is prepared. By snapping the gypsum core while leaving the paper face intact, you create a patch piece that has its own built-in membrane. That paper border bonds directly to the surrounding wall surface using joint compound, eliminating the need for any separate backer hardware. The result is a structurally sound, skim-coatable repair that sands and paints like the original wall.
This method is genuinely DIY-friendly, but it rewards patience. Rushing the drying stages is the most common reason repairs fail - a lesson well worth internalizing before you start. If you'd like to understand the broader range of things that can go wrong during drywall repairs, see what goes wrong when repairing drywall for a useful overview.
6-inch drywall knife
Applies and embeds the first coat of joint compound around the patch.
10-inch drywall knife
Spreads wider feathering coats of compound over the second and third passes.
Utility knife
Trims ragged edges around the hole and scores the scrap drywall piece.
Scrap drywall piece
Provides the material for the self-backing California patch.
All-purpose joint compound
Bonds the patch to the wall and builds up the smooth finish surface.
120- and 150-grit sandpaper with sanding block
Levels compound ridges between coats and produces a paint-ready surface.
PVA drywall primer
Seals the bare compound so paint absorbs evenly without flashing.
Work light or raking lamp
Reveals surface imperfections by casting angled light across the finished repair.
Preparing the Patch and the Wall
Before picking up a knife, take a moment to assess the hole. Trim any loose or torn paper around the damage using a utility knife so the edges are clean and flat. Ragged edges will telegraph through finished compound.
Cut a piece of scrap drywall that is noticeably larger than the hole - typically 2 to 3 inches of overlap on all sides. Score the back (gray side) of this scrap piece in a square matching the hole size, snap the gypsum along that score line, then carefully peel away the broken gypsum and the backing paper, leaving only the front paper face as a wide, clean border around your patch square. This paper border is what bonds the patch to the wall.
Hold the prepared patch over the hole and confirm it overlaps intact wall surface on all sides. If the hole is irregular, trace the patch onto the wall first and trim the hole to match.
What you will need
Applying the Patch and Building Up Compound
Spread a thin, even layer of all-purpose joint compound around the perimeter of the hole using a 6-inch drywall knife. Press the California patch firmly into place, paper border down, centered over the hole. Run your knife over the border to embed it fully and squeeze out excess compound. Wipe away the squeeze-out immediately - do not let it pile up at the edges.
Allow this first coat to dry completely. Drying time depends on temperature and humidity; do not judge dryness by time alone - feel the surface. Damp compound is cool to the touch and appears darker in color.
Once dry, apply a second coat of compound using an 8- or 10-inch knife, extending 2-3 inches beyond the patch border. Feathering - the gradual thinning of compound as you move outward - is what makes a repair disappear. Feathering compound correctly is the single skill that separates visible patches from seamless ones, and it is worth studying in detail before this step.
A third, wider coat is typically needed, extending 4-6 inches from the patch center. Each coat should be thinner than the last. Sand lightly between coats with 120-grit sandpaper to knock down any ridges, then wipe the surface clean before the next application.
Clean up the hole edges
Use a utility knife to trim any torn or crushed paper and loose gypsum around the hole perimeter. The goal is a firm, flat edge that compound can grip. Remove dust with a dry brush.
Cut and prepare the California patch piece
Cut a scrap drywall piece 2-3 inches larger than the hole on all sides. On the back (gray side), score a square matching the hole size and snap the gypsum. Peel away the broken core and backing paper, leaving the front paper face intact as a clean border around the gypsum plug.
Apply compound and press the patch into place
Spread a thin layer of all-purpose joint compound around the hole with your 6-inch knife, covering an area equal to the full size of the patch. Press the California patch firmly over the hole, paper border into the wet compound. Run your knife over the border with moderate pressure to embed it fully.
Let the first coat dry completely
Allow the embedded patch to dry fully before adding any additional compound. Do not rely on clock time alone - test by touching the surface. Fully dry compound feels warm and looks uniformly white.
Apply the second and third feathering coats
Using your 10-inch knife, apply a second coat extending 2-3 inches beyond the patch border, feathering the edges thin. After drying, lightly sand with 120-grit and wipe clean. Apply a third, even thinner coat extending 4-6 inches out from center. Each coat should be flatter and wider than the previous one.
Sand to a smooth, flush surface
Once the final coat is fully dry, sand with 120-grit on a sanding block to level any ridges, then finish with 150- or 180-grit. Feather your sanding strokes outward. The repaired area should feel flush with - not lower than - the surrounding wall.
Prime and prepare for paint
Wipe the sanded area clean with a barely damp cloth and allow it to dry. Apply a PVA drywall primer to the repair area. Once the primer is dry, rake a work light across the wall at a low angle to check for any remaining imperfections. Touch up, re-prime those spots, and then paint with your finish coat.
Sanding, Priming, and Final Inspection
Once your final coat is fully dry, sand the repair area progressively - start with 120-grit to level any high spots, then finish with 150- or 180-grit for a smooth surface. Use a sanding block rather than bare sandpaper to keep pressure even and avoid gouging. Feather your sanding strokes outward so there is no abrupt edge where the compound meets the original wall.
Wipe down the area with a barely damp cloth and let it dry. Then prime the repair before painting. Unprimed joint compound is highly porous and will absorb paint differently than the surrounding wall, creating a dull, flat spot called flashing even under multiple paint coats. A PVA drywall primer seals the compound properly.
Before opening any paint, use this pre-paint checklist to confirm your repair is truly ready. Raking a work light at a low angle across the wall is the most reliable way to spot remaining imperfections - shadows reveal what a straight-on view misses. Touch up as needed, re-prime any re-worked spots, and then paint.
This article is for informational purposes only. Always verify that your repair methods comply with local building codes. Consult a licensed contractor for structural wall damage or work that may require permits.
The content on this site is for informational purposes only and is not a substitute for professional advice. Always consult a qualified professional for guidance specific to your situation.