

Why Matching Texture Is Harder Than Patching the Hole
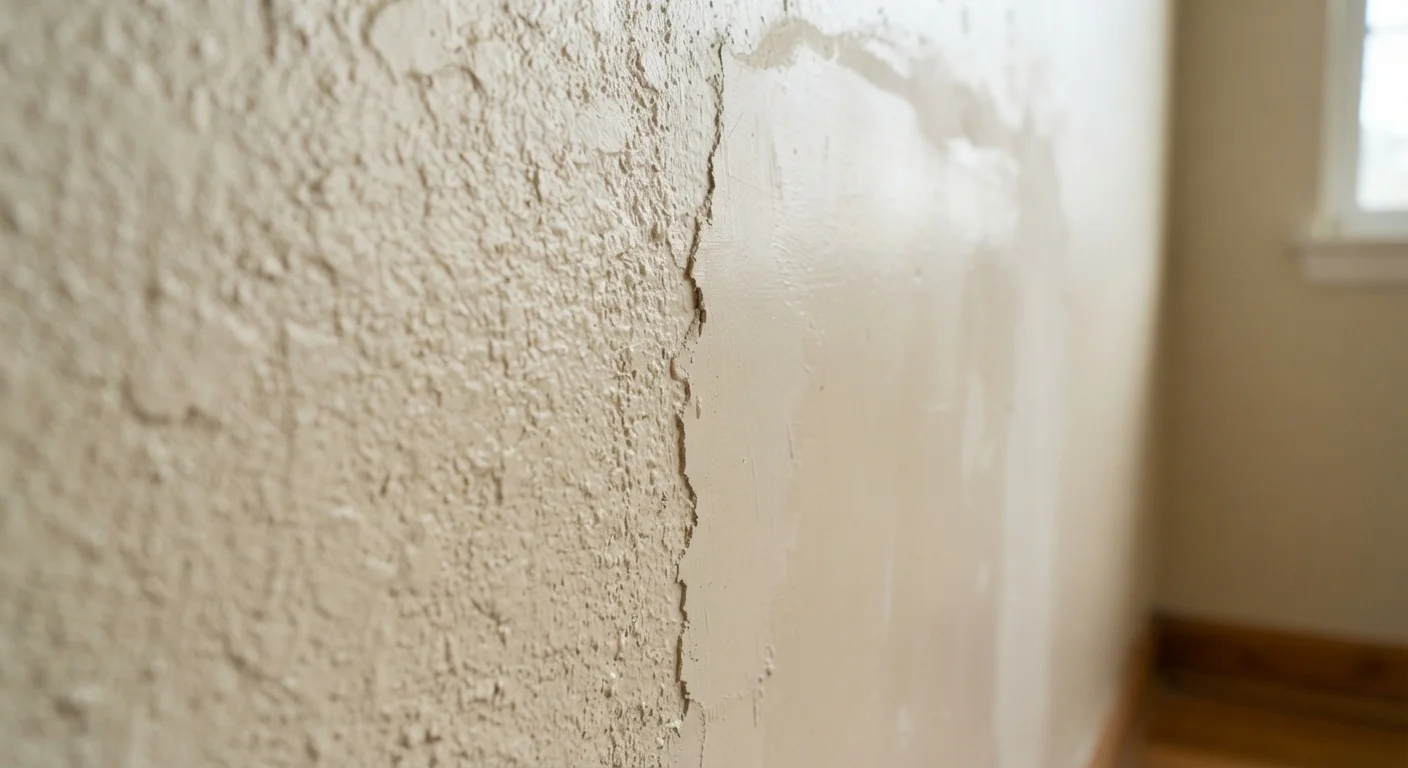
Most DIYers treat the patch itself as the main challenge - filling the hole, taping the seam, sanding smooth. But once that work is done, an unpainted, flat surface sits against a wall covered in years of accumulated texture. That contrast is often what makes a repair visible from across the room.
Texture matching requires two separate skills: correctly identifying what finish is already on the wall, and then replicating its depth, pattern, and density closely enough that paint unifies the surface. Neither step is especially difficult once you know what to look for, but skipping the identification step is the most common reason DIY repairs remain obvious after painting.
For context, the patching and compound work that precedes this process is covered in detail in our guide on feathering joint compound. This article picks up where that work ends - at the point where your patch is smooth, primed, and ready to receive texture.
Identifying the Texture on Your Walls
Hold a flashlight or work light parallel to the wall surface - nearly flat against it - and move it slowly. Raking light exaggerates relief and reveals the true depth and pattern of the texture in a way that overhead lighting never will. Take a photo for reference before you start.
The most common residential textures in US homes fall into a few categories:
- Orange peel: Fine, bumpy surface resembling citrus skin. Low relief, applied by spray. Very common in post-1970s construction.
- Knockdown: Irregular flattened splatter pattern. Created by applying compound with a roller or spray, then lightly skimming the high points before full drying.
- Skip trowel: Hand-applied, irregular arcs and flat patches with visible trowel edges. Slightly more artisanal look than knockdown.
- Popcorn (acoustic): Heavily stippled, cottage-cheese surface. Common on ceilings. Note: pre-1978 popcorn ceilings may contain asbestos - consult a professional before disturbing them.
- Sand finish: Fine, gritty uniform surface, often created with sand-added paint or texture compound.
- Smooth: No texture. Requires skim coating rather than texture application.
Once identified, note the approximate depth of the peaks - shallow, medium, or heavy - as this guides how much compound to apply and how diluted it should be.
What you will need
How to Recreate the Most Common Textures
The goal is to match the character of the surrounding texture, not produce a perfect clone of every square inch. Paint will unify small variations. Focus on overall depth, pattern scale, and density.
Prime the Patched Area
Before applying any texture, roll or brush drywall primer over the sanded patch. This seals the surface so the new compound won't dry unevenly or absorb at a different rate than the surrounding wall. Let it dry fully - typically one hour - before proceeding.
Mix Your Compound to the Right Consistency
For most hand-applied textures, thin all-purpose joint compound with water until it reaches a consistency slightly looser than peanut butter. For orange peel spray cans, no mixing is needed. For heavier skip trowel effects, keep the compound stiffer. Mix thoroughly and remove lumps - they create unintended raised spots.
Practice on Scrap Material First
Apply your chosen technique to a piece of scrap drywall or cardboard. Replicate the same depth and pattern density you photographed on the wall. Let it dry partially and compare it to the real surface under raking light. Adjust your technique - pressure, timing, dilution - before touching the actual repair.
Apply the Texture to the Wall
Apply using the appropriate method for your texture type:
- Orange peel: Use a spray can of orange peel texture held 18-24 inches from the wall. Apply in a sweeping motion, building up in thin passes.
- Knockdown: Roll thinned compound onto the wall with a thick-nap roller, then let it set for 5-10 minutes before lightly dragging a knockdown knife across the high points at a very shallow angle.
- Skip trowel: Apply irregular dabs of compound with a curved trowel, overlapping edges, then lightly skim the highest points to flatten them slightly.
- Sand finish: Mix fine sand into primer or use pre-mixed sand texture compound; roll or brush onto the surface evenly.
Keep your texture application slightly smaller than the primed area so there is a clear boundary to feather into.
Feather the Texture Edges
Where new texture meets existing texture, use a barely loaded trowel or damp sponge to thin and soften the boundary. The transition zone should be gradual - new texture fading into the surrounding surface - rather than a hard line. This is where most repairs succeed or fail visually.
Allow to Dry Completely, Then Prime Again
Let the texture dry for at least 24 hours. Once fully dry, apply a second coat of primer over the entire textured area. This second prime coat unifies the porosity of the new and old surfaces so paint absorbs consistently - without it, the repair area may appear lighter or darker than the surrounding wall even after painting.
Once your texture is fully dry, check your work again using raking light before priming. A low flashlight beam will reveal any areas that are too flat, too heavy, or have a noticeably different pattern scale. Touch up as needed before moving to primer and paint.
When you're confident the texture is correct, consult our pre-paint checklist - Before You Paint Over a Patched Wall - to confirm the repair is fully ready before opening a can.
Common Mistakes and How to Avoid Them
Even experienced DIYers run into the same texture-matching pitfalls. Knowing them in advance saves a second round of repairs.
- Skipping primer before texturing: Raw drywall compound absorbs moisture from new compound unevenly, causing the texture to dry at different rates and look patchy. Always prime the patch first.
- Wrong compound consistency: Too thick and it won't spread or spray properly; too thin and it lacks body. Aim for a consistency slightly thinner than peanut butter for most hand-applied textures, and thinner still for spray application.
- Texturing too large an area: Only apply new texture where needed, feathering the edges into the existing surface rather than creating a hard boundary.
- Not testing first: Always practice on scrap material. Texture techniques look deceptively simple but require a feel for timing and pressure that is hard to describe and easy to develop with two minutes of practice.
- Painting too soon: Texture compound must be completely dry - typically 24 hours minimum - before priming. Painting over damp compound causes adhesion failure and visible shrinkage.
Popcorn Ceilings and Asbestos Risk
Popcorn (acoustic) texture applied before 1978 may contain asbestos fibers. Disturbing this material during repair can release harmful particles into the air. Do not sand, scrape, or apply new material over suspect popcorn texture without first having a sample tested by a certified asbestos inspector. This is a safety requirement, not a precaution to skip.
The content on this site is for informational purposes only and is not a substitute for professional advice. Always consult a qualified professional for guidance specific to your situation.