

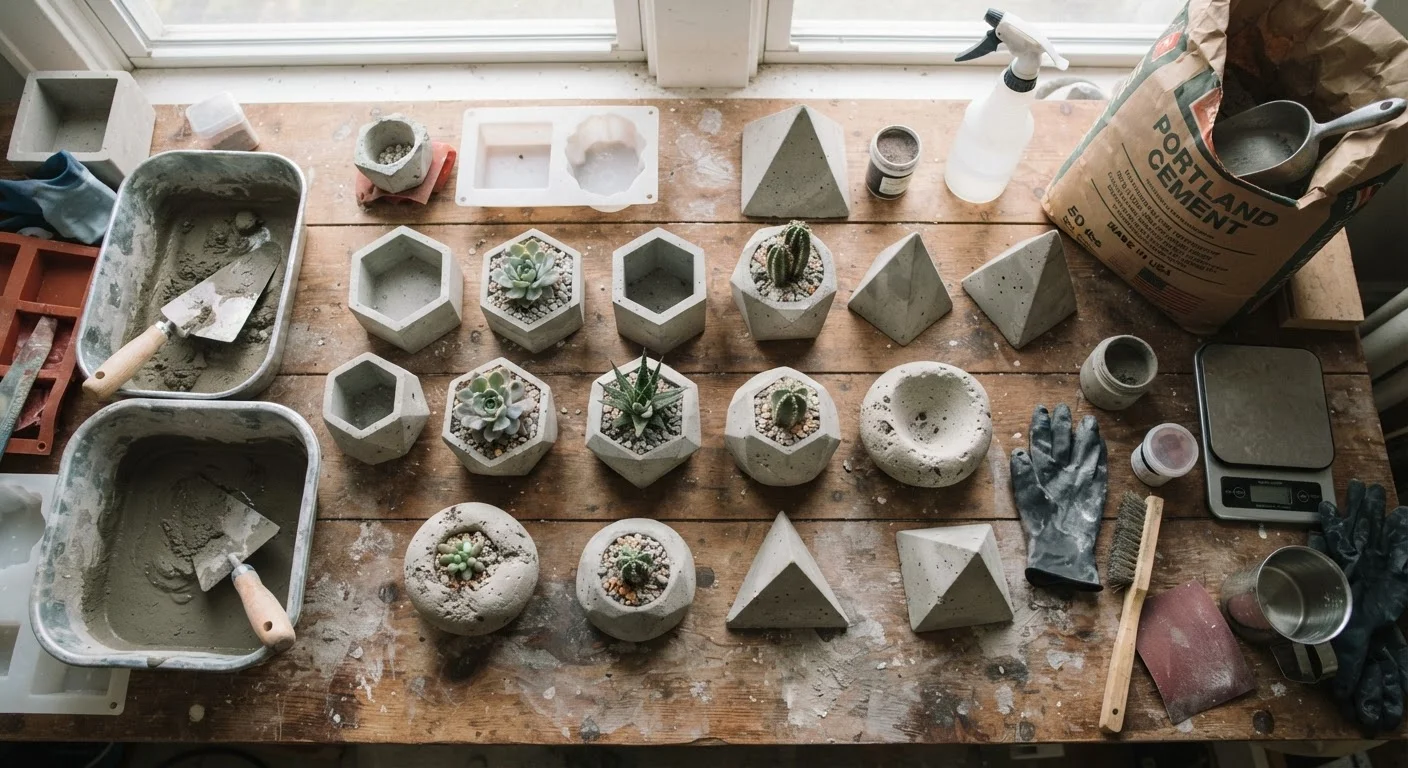
Why Cast Your Own Concrete Planters?
Store-bought concrete planters are heavy, expensive, and almost universally generic. Casting your own flips all three of those problems: you control the shape, you use a lightweight mix that won't break your back (or your deck), and the material cost for a set of three planters is typically a fraction of what you'd pay at retail. The craft also scales beautifully - once you've nailed one shape, the same process produces everything from angular geometric forms to soft, organic bowls.
Concrete casting is not a beginner craft in the same way decoupage is, but it's well within reach for anyone comfortable with basic measuring and patient enough to respect cure times. If you're new to outdoor growing, pair your new planters with the advice in our Starting a Garden From Bare Ground guide to set yourself up for a strong first season.
Portland cement
The binding agent that gives your planter structural integrity when mixed with aggregates.
Perlite or vermiculite
Lightweight aggregate that reduces overall planter weight while maintaining workability.
Inner and outer moulds
Define the planter's shape - plastic containers, cardboard tubes, or foam board all work well.
Mould release agent or petroleum jelly
Coats mould surfaces so the cured concrete releases cleanly without cracking.
Mixing bucket and trowel
Used to combine dry and wet ingredients to a consistent, lump-free mix.
Dowel or pencil
Inserted at the base of the mould to form a drainage hole during casting.
Concrete sealer
Applied to the cured interior surface to protect against moisture and soil acidity.
Safety gloves and goggles
Protects skin and eyes from alkaline cement irritation during mixing and pouring.
Shape-by-Shape Strategy: Geometric vs. Organic Forms
The technique is the same regardless of form, but mould choice is everything. Understanding which moulds suit which shapes will save you a lot of frustration before you ever open a bag of cement.
Geometric Planters
Sharp angles and flat planes call for rigid moulds. Nested square or rectangular plastic containers are the easiest starting point. For hexagons or custom polygons, cut foam-board panels and tape them into a frame - foam releases from cured concrete cleanly and can be torn away if needed. The key challenge with geometric forms is packing mix tightly into corners; use a narrow spatula and take your time.
Organic and Rounded Forms
Curved planters rely on flexible moulds - rubber bowls, latex, or balloon-stretched plastic wrap over a ball. The flexibility that makes them ideal for shaping also makes them easier to peel away after curing without cracking the planter. A tapered cylinder, for instance, can be cast inside a plastic drinking cup nested inside a larger bowl, producing a clean, modernist vessel that looks far more expensive than it is.
Once you have your containers ready to plant, small outdoor space design principles can help you arrange them in a way that feels intentional and expansive, even on a compact balcony or courtyard.
Shape Ideas Beyond the Basic Box
Geometric hexagons made from foam-board panels, tapered cylinders cast in cardboard tube forms, and faceted bowls built from folded plastic sheeting all produce striking, gallery-worthy results. Experimenting with texture - pressing burlap, lace, or bubble wrap against the inner wall of the outer mould - gives surfaces dimensional interest that's impossible to replicate in manufactured planters.
Follow the Steps to Cast Your Planter
The full casting process unfolds across five clearly defined stages. Follow them in order - especially the cure timing - and you'll finish with a planter that's structurally sound and ready to become the focal point of your outdoor setup.
What you will need
Choose and prepare your moulds
Select an outer mould that defines the planter's exterior shape and a smaller inner mould that will create the hollow planting cavity. For geometric planters, rigid plastic storage containers, milk cartons, or foam-board boxes cut to size work beautifully. For organic, rounded forms, try rubber bowls, plastic salad bowls, or balloon-shaped latex moulds.
Coat every surface that will contact concrete - inside the outer mould and outside the inner mould - with a generous layer of mould release agent or petroleum jelly. This step is the single most common point of failure for first-time casters.
Mix your concrete to the right ratio
For lightweight planters, a reliable mix is 1 part Portland cement : 1.5 parts perlite : 0.5 parts sand, with water added gradually until the mix reaches a thick, oatmeal-like consistency. It should hold its shape when squeezed but release water when pressed hard.
Avoid a soupy mix - excess water weakens the final structure and can cause surface cracking. Mix in a well-ventilated area and wear gloves throughout; wet cement is highly alkaline and can irritate skin with prolonged contact. For more on material differences, see our guide to concrete, mortar, and cement.
Pour the first layer and set the drainage hole
Spoon or pour roughly 1-1.5 inches of mix into the base of your outer mould, tamping it gently to eliminate air pockets. Press a dowel, oiled pencil, or cork into the center of this base layer - this will create your drainage hole. Do not skip this; drilling concrete after curing is difficult and risks cracking a finished planter.
Insert the inner mould and pack the walls
Center the inner mould on top of the base layer while the concrete is still workable. Weigh it down with sand, gravel, or water so it doesn't float up as you fill the walls. Then spoon concrete mix into the gap between the outer and inner mould, pressing it firmly with a trowel handle or dowel to remove voids. Aim for walls at least 1 inch thick for structural reliability - thinner walls on large planters are prone to cracking.
Cure, demould, and finish
Cover the filled mould loosely with plastic sheeting to slow moisture evaporation, then leave it undisturbed for at least 48 hours at room temperature. After demoulding, mist the planter lightly with water once a day for three to five days - this slow, moist cure significantly improves final strength.
Once fully cured (allow 28 days for full hardness), remove the dowel to open the drainage hole and lightly sand any rough edges with 80-grit sandpaper. Optionally, apply a water-based concrete sealer to the interior before planting. For planting tips once your container is ready, explore our container gardening on patios guide for soil, drainage, and plant pairing advice.
Concrete Is Highly Alkaline When Fresh
Freshly mixed and newly cured concrete has a high pH that can harm plant roots if left untreated. Always rinse new planters thoroughly with water and allow them to weather outdoors for one to two weeks - or use the diluted vinegar rinse described in Step 5 - before planting. Sensitive plants like ferns and mosses are especially vulnerable to alkaline conditions.
Troubleshooting Common Problems
Even experienced casters hit snags. Here are the most frequent issues and how to address them:
- Mould won't release: Soak the exterior in warm water for 30 minutes to soften any bond, then gently flex the mould while twisting. Never pry with sharp tools - you'll chip the concrete edge.
- Surface cracking during cure: Usually caused by drying too fast. Keep the planter covered with plastic and mist daily. Fine hairline cracks are cosmetic; deep cracks indicate structural weakness and the piece should not be used.
- Walls too thin or uneven: Happens when the inner mould shifts during filling. In future casts, tape or clamp the inner mould securely before pouring. A minimum 1-inch wall thickness is the reliable threshold.
- Bubbled or pitted surface: Air pockets trapped against the mould wall. Tap the mould vigorously after pouring, and consider using a slightly wetter mix for smoother results - understanding the trade-off between workability and strength is part of the learning curve.
This article provides general DIY guidance for decorative concrete casting. Always verify local codes and safety requirements, and consult a qualified professional for any structural or hazardous applications.
The content on this site is for informational purposes only and is not a substitute for professional advice. Always consult a qualified professional for guidance specific to your situation.