

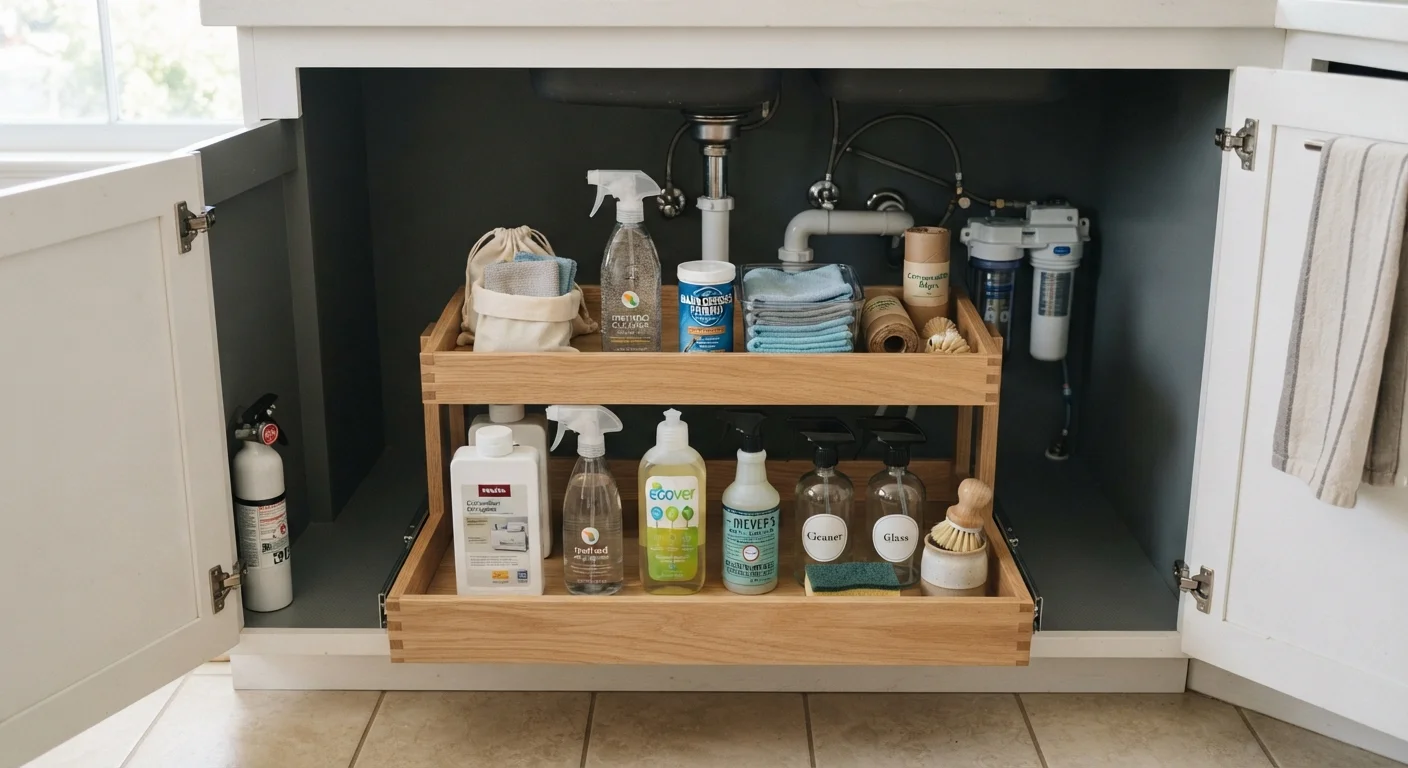
Why the Under-Sink Cabinet Defies Normal Organisation
The under-sink cabinet is one of the most awkward spaces in any home. It's wide but interrupted by pipes, tall but wasted because items stack poorly on a flat floor, and deep enough that anything pushed to the back becomes effectively invisible. Standard shelf inserts rarely account for plumbing, and flat-bottom bins do nothing to reclaim the vertical space above them.
A custom two-tier pull-out organiser solves all three problems at once. By rolling the entire unit out of the cabinet, you eliminate the need to reach blind into a dark corner. Two tiers convert dead vertical height into two usable zones. And because you're building to your own measurements, the design works around your specific pipe layout rather than ignoring it.
This approach fits equally well under a kitchen sink or a bathroom vanity. For broader kitchen organisation strategies that don't require any new cabinetry, the guide to organising a small kitchen without new cabinets offers complementary ideas worth exploring alongside this project. For a deeper dive into material selection and joinery techniques, DIY Organisers from Start to Finish covers the full planning process.
Account for the Plumbing Before You Cut
Under-sink cabinets are rarely empty boxes - drain pipes, supply lines, and garbage disposal units all claim floor and wall space. Sketch a rough map of these obstacles before finalising your dimensions. Many builders split the base into two side-by-side sections with a central gap that clears the drain pipe entirely, allowing both halves to slide independently.
What You'll Need Before You Start
This project requires intermediate comfort with basic woodworking - straight cuts, pre-drilling, and driving screws - but no advanced joinery skills. Gather everything listed below before beginning so you're not hunting for materials mid-build.
What you will need
Tape measure
Accurately measure cabinet interior width, depth, and height before cutting any materials.
Half-inch (½") plywood sheet
Primary structural material for the base, sides, and shelves of the organiser.
Circular saw or jigsaw
Cut plywood panels to the measured dimensions.
Full-extension drawer slides (pair)
Allow the organiser to roll smoothly out of the cabinet and extend fully for rear access.
Drill and drill bits
Drive screws when assembling the box frame and attaching drawer slides.
Wood screws (1¼" and 1½")
Fasten plywood panels together to form the organiser box.
Sandpaper (120 and 220 grit)
Smooth cut edges and surfaces before sealing to prevent splinters and improve moisture resistance.
Polyurethane or interior latex paint
Seal finished surfaces to protect the wood from under-sink moisture.
If you'd rather avoid purchasing all-new materials, repurposed household items can fill in for several of these components - wooden crates, for instance, can substitute for a built box if the dimensions work in your favour.
Step-by-Step: Building and Installing Your Organiser
Work through these steps in order. Skipping ahead - especially cutting before measuring or installing before sealing - is the fastest route to a rebuild.
Do Not Disturb Plumbing Connections
This project involves working around - not with - supply lines, drain pipes, and shutoff valves. Do not loosen, modify, or reposition any plumbing components to make the organiser fit. If existing pipes prevent a clean installation, adjust your organiser design with cutouts or split panels instead. Any changes to plumbing connections should be handled by a licensed plumber.
Empty the cabinet and take detailed measurements
Remove everything from under the sink. With the cabinet clear, use your tape measure to record three critical dimensions: interior width, interior depth (front rail to back wall), and usable height above the floor to the lowest obstruction (often the underside of the sink basin). Note the location of drain pipes, supply lines, and any disposal unit. These will determine where your plywood base needs cutouts or how to split the design into two side sections.
Plan your two-tier dimensions on paper
Sketch the organiser to scale. A typical two-tier pull-out consists of a lower rolling base (the sled) and an upper shelf elevated on short side walls. Subtract ¾" from your measured cabinet width to account for the drawer slide hardware on each side. Decide on the height of the lower tier - usually 6 to 8 inches - leaving enough clearance above for the upper shelf to hold shorter bottles and cans. Write every dimension on your sketch before touching the saw.
Cut the plywood panels
Using your circular saw or jigsaw, cut the following panels from ½" plywood: one base panel, two lower-tier side walls, one upper shelf panel, and two upper-tier side walls. If your design splits around a drain pipe, cut two narrower base panels instead of one full-width piece. Label each piece with a pencil immediately after cutting. Sand all cut edges with 120-grit sandpaper, then finish with 220-grit for a smooth surface.
Assemble the lower-tier box
Stand the two lower side walls upright on the base panel and fasten them with 1½" wood screws driven through the base up into the side walls. Pre-drill pilot holes to prevent splitting. Check that corners are square using the 3-4-5 triangle method or a framing square. This base box forms the rolling sled - it needs to be rigid and level.
Add the upper shelf and attach it to the side walls
Rest the upper shelf panel across the tops of the lower side walls, or on a second set of taller side walls if your design elevates it further. Fasten with 1¼" screws. The gap between the base floor and the underside of the upper shelf becomes your lower storage zone; the shelf surface itself is your upper zone. Confirm the assembled unit fits within your measured cabinet opening before proceeding.
Seal the wood against moisture
Under-sink environments are humid. Apply at least two coats of polyurethane or interior latex paint to all surfaces, including the underside of the base. Let each coat dry fully according to the product's instructions before applying the next. This step is not optional - unsealed plywood will swell and delaminate within months in a damp cabinet.
Install the drawer slides
Full-extension drawer slides have two components: a cabinet-mount member (fixed) and a drawer-mount member (slides with the box). Screw the cabinet-mount members to the interior floor of your under-sink cabinet, parallel to each other and level. Then attach the drawer-mount members to the outside faces of your organiser's lower side walls at the same height. Test the glide action - the organiser should roll smoothly to full extension and retract without binding.
Load, adjust, and organise
Slide the organiser fully into the cabinet and test the pull-out action with some weight loaded. Group items by frequency of use - daily items on the upper tier where they're visible, backup stock or less-used products on the lower tier. Add small bins, baskets, or tension-rod dividers on each shelf to prevent bottles from tipping during use. For a bathroom version of this same project, see our guide to bathroom storage upgrades for complementary ideas.
Once installed, this organiser typically takes under five minutes to load thoughtfully. The kitchen storage primer offers further guidance on organising the cabinet zones surrounding your new pull-out.
The content on this site is for informational purposes only and is not a substitute for professional advice. Always consult a qualified professional for guidance specific to your situation.