

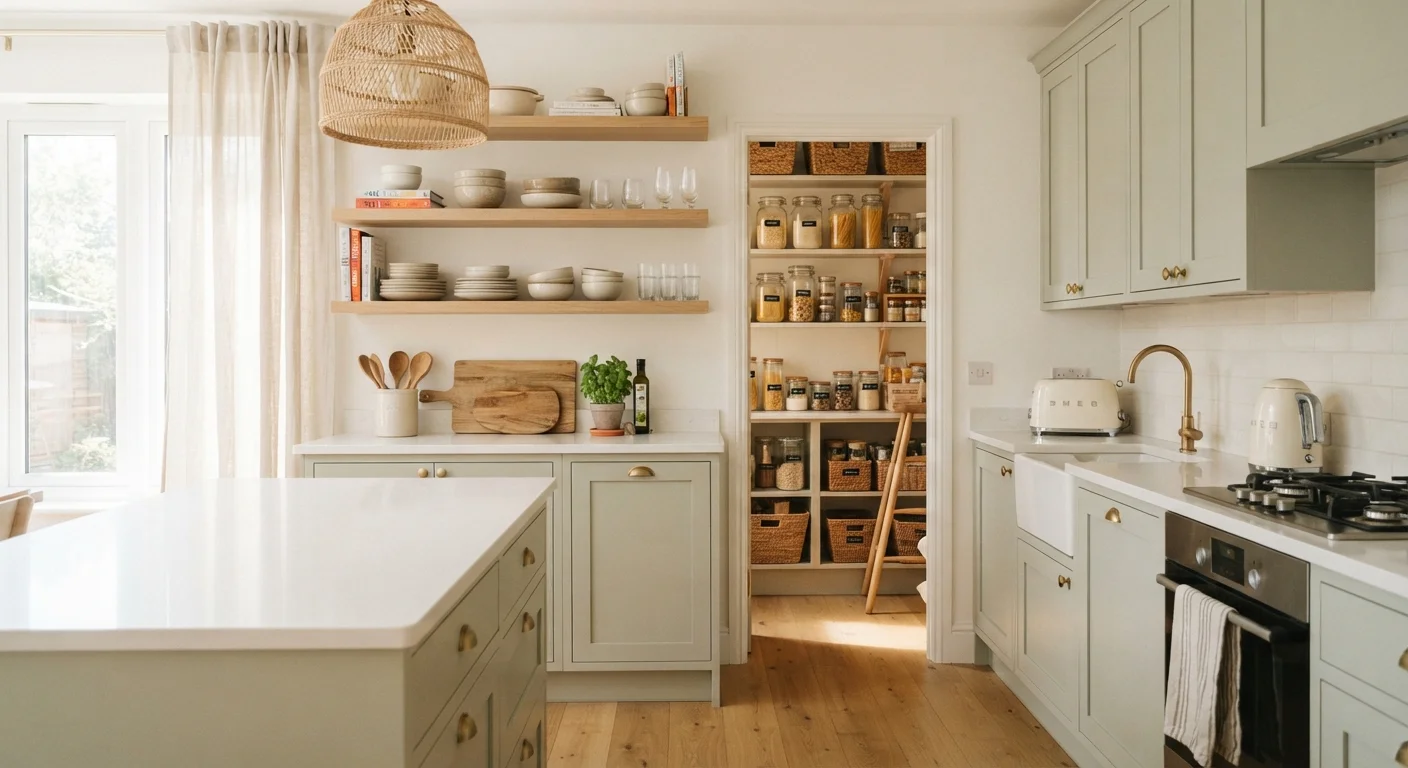
Start here
Understanding Kitchen Storage Zones
Next
Countertop Storage: Keep It Intentional
Then
Cabinet and Drawer Storage: Working the Interior
Going deeper
Pantry and Deep Storage: Organizing the Long Game
Wrap up
Putting It All Together
Understanding Kitchen Storage Zones
Most kitchen frustration traces back to one root problem: things are stored where they landed, not where they belong. A zone-based approach changes that by assigning every category of item a logical home - one matched to how often you use it and what's happening nearby in the kitchen.
The four main kitchen storage zones are: countertops (active, visible, daily-use), cabinets (enclosed, medium-to-frequent use), drawers (quick-access tools and utensils), and pantry or deep storage (bulk, backup, and infrequently used items). Each zone has a different job, and overloading any one of them creates the ripple effect that makes a kitchen feel perpetually chaotic.
For a broader view of how this zone logic applies across your entire home, see the complete home organization framework that walks through every room from kitchen to garage.
Storage zone
A designated area in a kitchen (or any room) assigned to a specific category of items based on how often they're used and what tasks happen nearby.
Shelf riser
A small platform insert placed inside a cabinet that creates a second, elevated tier - allowing more items to fit in the same vertical space.
Dead zone
An area inside a cabinet or pantry that is technically accessible but difficult to reach in practice, such as the back of a deep corner cabinet.
Decanting
Transferring food or supplies from their original packaging into uniform containers - typically to save space, improve visibility, and keep contents fresh longer.
Lazy Susan
A rotating circular platform placed inside a cabinet or on a shelf that allows items stored at the back to be accessed by simply spinning the tray.
Countertop Storage: Keep It Intentional
Countertops are your kitchen's most visible real estate, which makes them both the most tempting dumping ground and the most powerful organizing tool - if used deliberately. The core principle: the countertop is for action, not storage.
Daily-use appliances (coffee maker, toaster, electric kettle) earn a permanent spot. A knife block near the cutting area and a small utensil crock beside the stove are practical countertop fixtures. Everything else - the blender used twice a month, the stand mixer, the fruit bowl that collects junk mail - should be evaluated honestly.
- Group by activity: Keep prep tools near your cutting area, cooking tools near the range, and coffee gear near the sink or outlet it uses.
- Use vertical lift: A small riser or tiered tray consolidates small bottles and jars without spreading them across the counter.
- Treat the backsplash as storage: A mounted magnetic knife strip or a rail with hooks can move items off the counter without losing them entirely.
If you're weighing whether to keep items visible or tucked away, our comparison of open shelving vs. closed storage covers the practical and aesthetic trade-offs in detail.
Cabinet and Drawer Storage: Working the Interior
Most kitchen cabinets are underperforming - not because they lack space, but because that space is used inefficiently. Standard cabinet shelves leave a significant gap between stacked items and the shelf above. That gap is wasted storage.
Inside Cabinets
- Shelf risers and stackers: These low-cost inserts create a second tier for plates, mugs, or canned goods - effectively doubling usable shelf depth without any permanent modification.
- Pull-out or lazy Susan inserts: Corner cabinets are notorious dead zones. A simple rotating insert makes every item in the back accessible without unpacking the front.
- Door-mounted organizers: The inside face of cabinet doors is almost always unused. Slim racks here work well for lids, spice jars, or cleaning supplies stored under the sink.
Inside Drawers
Drawers handle what cabinets can't: flat items, small tools, and utensils that would otherwise pile up. A simple divider tray keeps utensils from becoming a jumbled heap. Designate one drawer for cooking tools, one for prep gear (peelers, graters, measuring spoons), and one for miscellaneous items - then stick to those assignments.
If your cabinets still feel full despite good organization, this breakdown of why cabinets feel overcrowded identifies the layout and habit patterns that are usually responsible.
The One-In, One-Out Rule for Drawers
Kitchen drawers fill up faster than almost any other storage space because small items accumulate gradually. Try a simple maintenance rule: whenever a new utensil or tool comes in, an old one that's rarely used goes out. This keeps drawers functional without a periodic deep-clean overhaul.
Pantry and Deep Storage: Organizing the Long Game
Whether your pantry is a dedicated closet, a freestanding cabinet, or just two deeper shelves, the organizing logic is the same: frequency of use determines placement.
- Eye level: Everyday staples - pasta, canned tomatoes, cooking oil, cereals. These should require zero hunting.
- Above eye level: Backup stock, bulk items, and infrequently used pantry goods. Decant bulk grains into labeled airtight containers to keep this area navigable.
- Below eye level: Heavy items (large cans, jars, bottles) and appliances that overflow from cabinet space.
Group within each tier by category, but don't over-engineer it. Broad groupings - baking supplies, canned goods, snacks, grains - work better in practice than hyper-specific sub-sections that require maintenance to sustain.
Bins and baskets serve a real function here: they corral loose, oddly shaped packaging and make it possible to pull an entire category forward without shuffling individual items. Label the bin, not every item in it.
For hands-on storage builds that work in pantry spaces, the DIY organizers guide covers material choices, shelf anchoring, and room-by-room project ideas.
Putting It All Together
Improving kitchen storage doesn't require a renovation. It requires applying the right logic to each zone, one at a time. Start with a countertop audit: clear everything off and only return what you use daily. Then move to cabinets - add a riser or two where stacking is inefficient. Tackle the pantry last, using frequency of use to guide shelf placement.
The goal isn't a perfectly staged kitchen. It's a kitchen where you can find what you need, use it easily, and put it back without thinking. Small, targeted changes to each zone consistently deliver better results than sporadic whole-kitchen reorganizations.
When you're ready to think about hardware and finish updates that complement your storage upgrades, replacing cabinet hardware is one of the quickest wins available - and it requires no specialized skills.
This article is intended as general guidance for home organization. Storage solutions and structural modifications should be evaluated for your specific cabinetry and kitchen layout. Always follow manufacturer instructions for any inserts, organizers, or mounted accessories.
Frequently Asked Questions
Only items you use daily or near-daily belong on the countertop. Everything else takes up prime real estate without earning it. A good test: if you haven't reached for it in a week, it belongs in a cabinet or drawer.
Stackable shelf risers are the easiest starting point - they double vertical space inside a cabinet without any tools or permanent changes. They work especially well for dishes, canned goods, and mugs.
Freestanding wire or solid shelving units can stand in for built-in pantry shelves. Group items by how often you use them, with everyday staples at eye level. Use bins or baskets to corral loose packages and reduce visual chaos.
Yes - many effective kitchen storage improvements cost little or nothing. Decluttering, repositioning items to the right zone, and using containers you already own are free. Simple add-ons like tension rods or shelf risers are low-cost starting points.
Zone logic matters even more in small kitchens because every inch is critical. Assign specific spots to categories - cooking tools near the stove, prep gear near the cutting area - and use vertical space inside cabinets to compensate for limited floor area.
Start with a full countertop clear-out - move everything off and only return what you actually use daily. This immediately makes the kitchen feel more functional and reveals which zones need the most attention next.
The content on this site is for informational purposes only and is not a substitute for professional advice. Always consult a qualified professional for guidance specific to your situation.