

Why Bedrooms Without Walk-In Wardrobes Need a System, Not Just More Storage
The absence of a walk-in wardrobe is rarely the root cause of a disorganized bedroom. More often, the culprit is the absence of a clear system - a defined place for every category of item, consistently maintained. Adding more baskets or another dresser to an already muddled room typically compounds the problem rather than solving it.
This guide takes a different approach. Rather than recommending a shopping list upfront, it starts with an audit, then works outward through walls, doors, under-bed space, and freestanding furniture - in that order. The result is a storage arrangement tailored to what you own and how your specific room is shaped.
For context on how bedroom storage fits into a broader household framework, the room-by-room storage framework provides a useful end-to-end reference. And if you're also working on other rooms, living room storage ideas covers how to add capacity without visual clutter in shared spaces.
Audit Before You Buy Anything
The most common storage mistake is purchasing organizers before decluttering. Every item you remove from your bedroom reduces the storage problem. Donate, discard, or relocate anything that doesn't belong in a sleep space before assessing what solutions you actually need.
Before moving to the step-by-step process, gather your tools and take stock of your prerequisites below.
What you will need
Tools and Materials You'll Need
The tools required depend on how many wall-mounted elements you plan to install. For a fully freestanding approach, you may only need a measuring tape and labels. For shelves and hooks, a drill and stud finder become essential.
Measuring tape
Measure wall space, floor area, and furniture dimensions before purchasing any storage solution.
Stud finder
Locate wall studs to safely anchor floating shelves or tall freestanding units.
Level
Ensure shelves and hanging rods are installed straight.
Drill and basic bit set
Required for mounting wall brackets, hooks, or shelf supports.
Vacuum storage bags
Compress seasonal bedding and bulky items to maximize under-bed or shelf space.
Label maker or adhesive labels
Identify bin and basket contents so the system stays organized over time.
Use Consistent Containers for a Calmer Look
Mixing too many basket styles, bin colors, and shelf heights creates visual noise that makes a room feel smaller. Choosing two or three compatible container types across your storage system gives open shelving and freestanding units a more intentional, relaxed appearance.
Once you have your tools ready, work through the steps below in order. Skipping the early audit steps in favor of jumping straight to installation is the most common reason DIY storage projects underperform.
Step-by-Step: Building Your Bedroom Storage System
Follow each step in sequence. The early steps - auditing and mapping - take the most time but do the most work. They prevent you from buying the wrong solutions or placing storage in positions that don't suit your actual habits.
Audit and categorize everything that needs a home
Before touching a single shelf or hanger, sort every item into categories: everyday clothing, seasonal clothing, shoes, accessories, and bedding. This tells you the volume and type of storage you actually need rather than what you assume you need.
Be ruthless about what belongs in the bedroom at all. Items used less than once a month - hobby gear, extra linens, off-season clothing - can often move to a hallway closet, attic, or another room entirely.
Map your available space - walls, floor, and door backs
Measure every usable surface: the width and height of bare walls, the space behind the door, the clearance under your bed, and any alcoves or recesses. Write these down. Most people discover more usable inches than they expected once they look systematically.
Sketch a simple floor plan - even a rough one on paper - and mark where natural light falls. Avoid blocking windows with tall furniture, as this makes rooms feel darker and smaller.
Install wall-mounted shelving for folded clothing and accessories
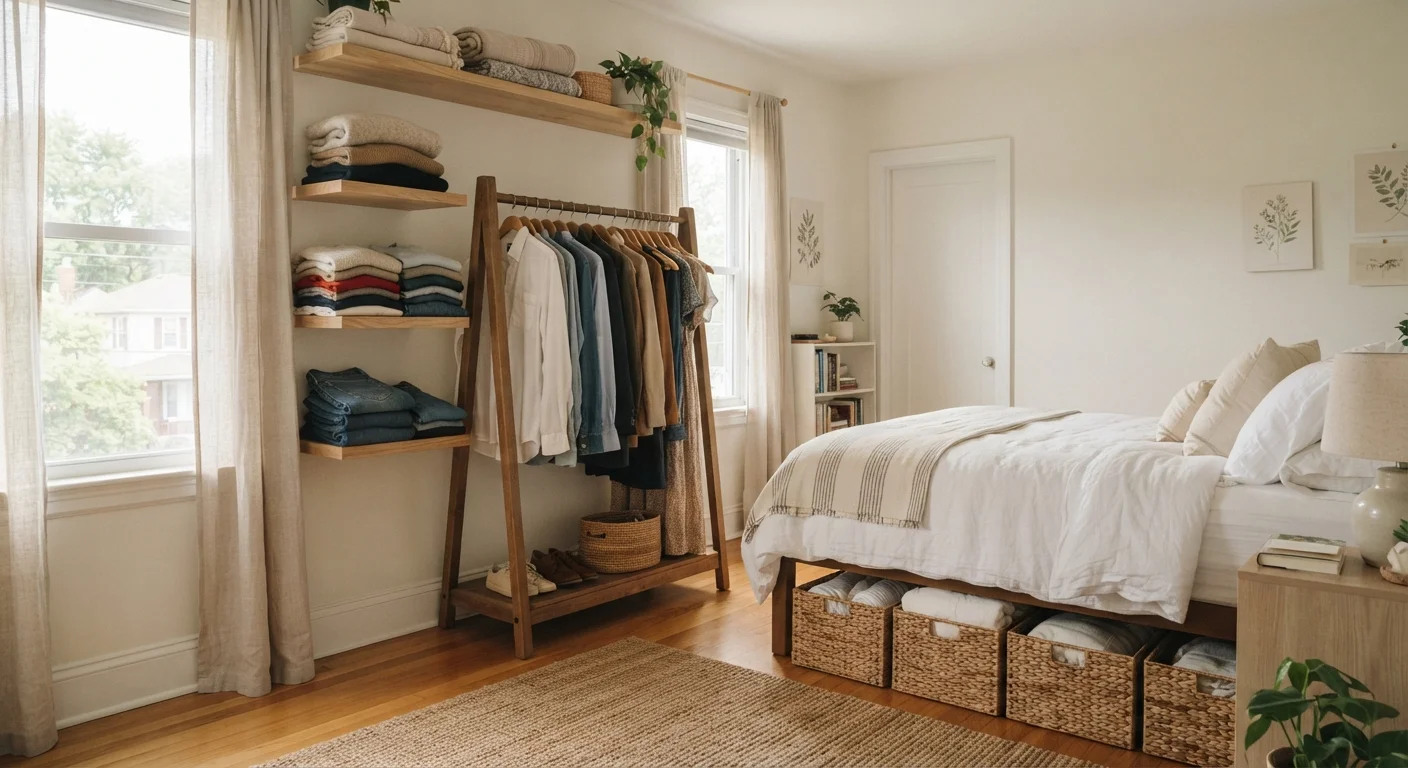
Floating shelves or bracket-mounted shelving runs are among the most space-efficient bedroom storage tools. A column of four to five shelves on a single wall can replace the folded-goods capacity of a full dresser while taking up minimal floor area.
Anchor all shelves to wall studs using appropriate hardware. Use the shelves for neatly folded items - stacked jeans, sweaters, or t-shirts - and add baskets or bins to contain smaller accessories without visual clutter.
Add a freestanding clothing rack for hanging garments
A freestanding garment rack gives you wardrobe-style hanging capacity with no installation required. Position it in a corner or alcove to reduce its visual footprint. Limit what hangs there to items you reach for regularly - a rack crowded with rarely worn pieces defeats the purpose.
For a tidier look, use matching hangers and maintain a consistent spacing between garments. A small curtain or fabric panel can be hung in front of an open rack if you prefer a more enclosed appearance.
Maximize under-bed storage strategically
Under the bed is valuable real estate - but only for the right items. Flat, low-profile bins work well for seasonal clothing, spare bedding, and extra pillows. Avoid storing anything sensitive to dust, humidity, or restricted airflow in this zone without appropriate protective containers.
See our guide to under-bed storage for a detailed breakdown of which categories store well in this space and which are better placed elsewhere.
Zone your room so categories stay separated
Once storage pieces are in place, assign a specific zone to each category: hanging garments in one area, folded clothing on shelves, shoes near the door, and bedding in a dedicated bin or chest. Zones prevent the gradual drift that causes organized systems to collapse over time.
Label bins and baskets so that maintaining the system requires no memory or decision-making. This is particularly valuable in shared bedrooms where multiple people interact with the same storage.
Wall Anchoring Matters for Heavy Shelves
Floating shelves or tall freestanding units loaded with clothing can be a tipping or collapse hazard if not properly secured. Always anchor heavy furniture to wall studs, and follow manufacturer load guidelines. If you're uncertain about wall construction, consult a handyman before installing anything structural.
If your bedroom has children sharing the space, the kids' room storage guide addresses how to adapt these same principles for a space that needs to evolve as children grow. For creative, lower-cost organizer builds, the DIY organizers hub has a range of projects that complement this approach.
Maintaining the System Over Time
The best-organized bedroom requires a short weekly reset - returning items to their designated zones and removing anything that crept in from other rooms. This takes less than ten minutes once a system is established and prevents the gradual entropy that undoes even well-planned storage layouts.
Twice a year, typically as seasons change, revisit the audit step. Seasonal clothing rotations are the most common reason storage systems need adjustment. Vacuum storage bags can compress bulky off-season items significantly, freeing shelf and bin space for current-season wear.
If you're interested in expanding these principles to adjoining spaces, room styling tips offers practical guidance on making storage look intentional rather than improvised - a useful complement once the functional side is sorted.
The content on this site is for informational purposes only and is not a substitute for professional advice. Always consult a qualified professional for guidance specific to your situation.