

Why Your Workspace Setup Matters as Much as the Tools
Most beginner DIYers focus their energy on choosing the right tool for a job - and that matters. But the environment where you use those tools shapes your safety and your results just as much. A cramped, poorly lit, or cluttered workspace turns even a routine cut into a stressful and potentially dangerous task.
Before you plug anything in, it pays to think through a few spatial and safety fundamentals. See our pre-session safety checklist for a session-by-session companion to the one-time setup steps below.
You don't need a dedicated room or an expensive renovation. A cleared garage bay, a corner of a basement, or even a covered outdoor area can serve as a functional workshop - provided you address the conditions outlined here.
What you will need
Step-by-Step: Building a Functional, Safe Workshop
Work through the following steps in order. Some - like lighting - can be addressed in an hour; others, like electrical capacity, may require a licensed electrician before you proceed. Don't skip the infrastructure steps in favor of getting to the fun parts.
Evaluate and Improve Your Lighting
Shadows and dim conditions are a leading cause of workshop mishaps. Aim for bright, even illumination across your entire work surface - not just a single overhead bulb. LED shop lights are widely available and energy-efficient; mounting two or more in parallel above your primary work area eliminates most shadowing.
Natural light from windows is a bonus, but never rely on it as your primary source - you'll also work in the evening or on overcast days. Position lights so they don't create glare directly in your line of sight when operating tools.
Address Ventilation Before Any Cutting or Finishing Work
Sawdust, MDF particles, and finishing fumes all pose real respiratory risks. At minimum, your workspace needs cross-ventilation: an openable window or door at one end, and a fan moving air out at the other. For enclosed spaces like basements, a box fan in a window exhausting outward works reasonably well for general woodworking dust.
If you plan to work with paints, stains, solvents, or adhesives, ventilation requirements increase significantly. Many finishing products release flammable vapors - ensure no ignition sources (including power tool sparks) are present and that air exchange is continuous. Always read product labels for specific ventilation requirements.
Set Workbench Height to Match Your Body
An incorrect bench height is one of the most overlooked ergonomic problems in home workshops. A surface that's too low forces you to hunch, reducing control and fatiguing your back. Too high, and you lose leverage and stability. A general guideline: the bench surface should sit at or just below your hip crease when you're standing upright.
If you're building or buying a workbench, aim for an adjustable or purpose-set height. If you're repurposing an existing table, rigid risers or a low platform for you to stand on can compensate. For tasks involving downward pressure - like planing or chiseling - a slightly lower surface (2-3 inches below the hip) gives better mechanical advantage.
Plan and Manage Electrical Capacity
Most power tools draw significant amperage, especially on startup. Running multiple tools from a single household circuit - or daisy-chaining extension cords - can trip breakers or, worse, overheat wiring inside walls. Check the amperage rating on each tool you plan to use and compare it with your circuit's capacity (typically stamped on the breaker).
If your space lacks adequate outlets or circuit capacity, consult a licensed electrician before proceeding. This is not a step to work around with longer extension cords. Use only heavy-duty extension cords rated for the amperage of your tools - underrated cords overheat. See our article on corded vs. cordless tools for guidance on how your power setup affects tool selection.
Implement Cable and Cord Management
Cords on the floor are a trip hazard and get damaged when heavy materials are dragged over them. Route cords overhead using hooks or cable trays where possible, or tape them to walls along baseboards when overhead routing isn't an option. Never run cords under rugs or mats - heat buildup and wear go undetected.
Keep a dedicated area for coiling and hanging unplugged cords. Velcro cable ties (reusable and gentle on cord jackets) work better than twist ties, which can bite into insulation over time. Inspect cords for cuts, fraying, or damaged plugs before every session.
Define a Clear Cutting Zone
Designate one area - ideally your workbench or a dedicated outfeed table - as the only place where power cutting tools are used. Keep this zone free of clutter, off-cuts, and bystanders at all times. Mark the perimeter with floor tape if it helps reinforce the habit.
Ensure adequate clearance on all sides of your cutting surface: at least three feet behind you, and enough room in front and to the sides to support full-length workpieces without them tipping or binding. Unsupported workpieces that drop or shift mid-cut are a significant source of kickback injuries.
Storage, Organization, and Keeping It That Way
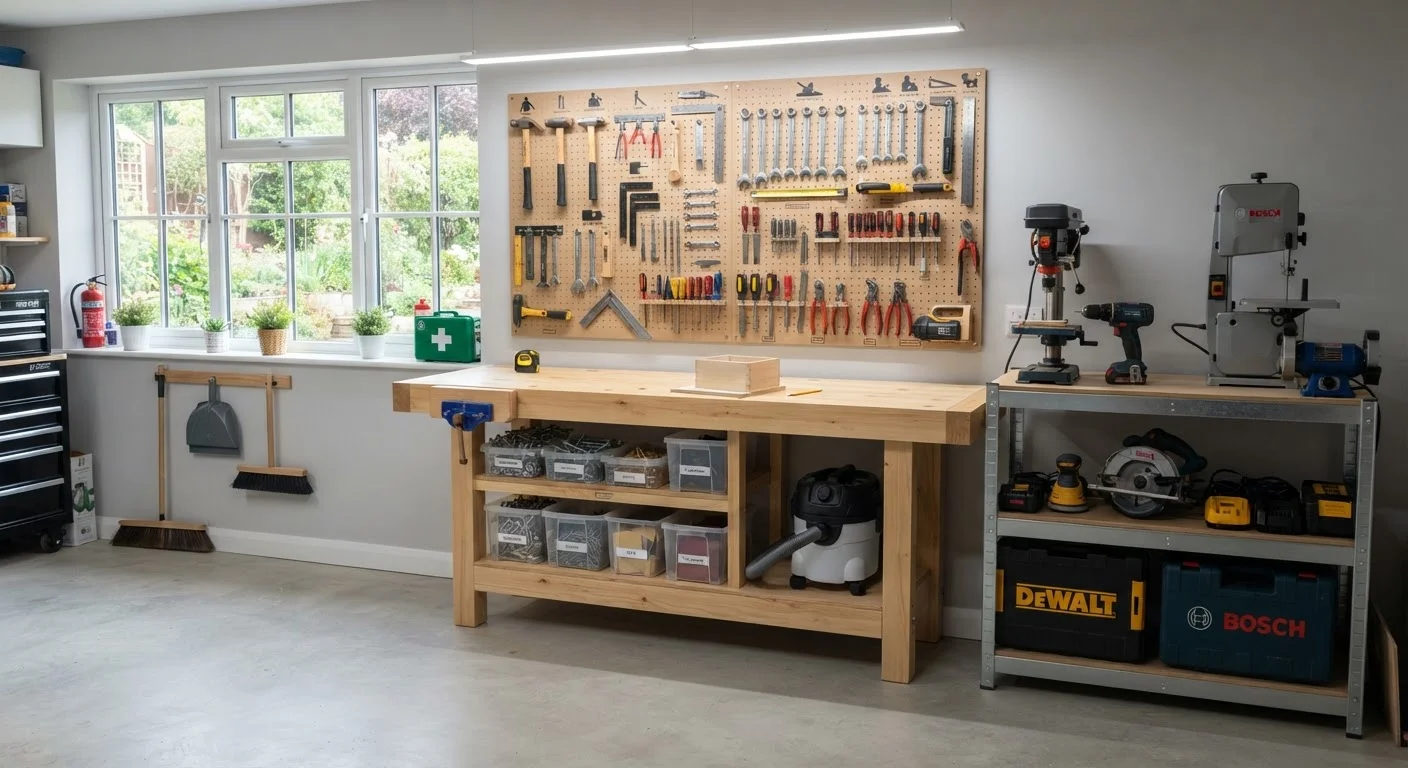
A workshop that starts organized tends to stay organized only if storage is built into the workflow. Wall-mounted pegboards are a low-cost way to keep frequently used hand tools visible and within reach. Our garage wall storage guide covers mounting system options and weight limits in detail.
Power tools not in active use should be stored in cases or on dedicated shelves - never left on the floor where they can be tripped over or damaged. Proper storage also extends tool life considerably; for guidance on that, see storing and maintaining power tools.
Build the Habit of a Post-Session Reset
Before leaving your workshop, spend five minutes returning tools to storage, coiling cords, and sweeping the floor. This isn't just tidiness - accumulated sawdust is a fire risk, and a clear floor means your next session starts safe. Pair this habit with a quick pre-session checklist review and you'll catch most hazards before they become problems.
Finally, once your space is set up, revisit it regularly. Sweep dust after every session, coil and hang cords, return tools to their designated spots, and check that your fire extinguisher is charged. A tidy workshop isn't about aesthetics - it's about being able to work safely next time without setup overhead.
The content on this site is for informational purposes only and is not a substitute for professional advice. Always consult a qualified professional for guidance specific to your situation.