

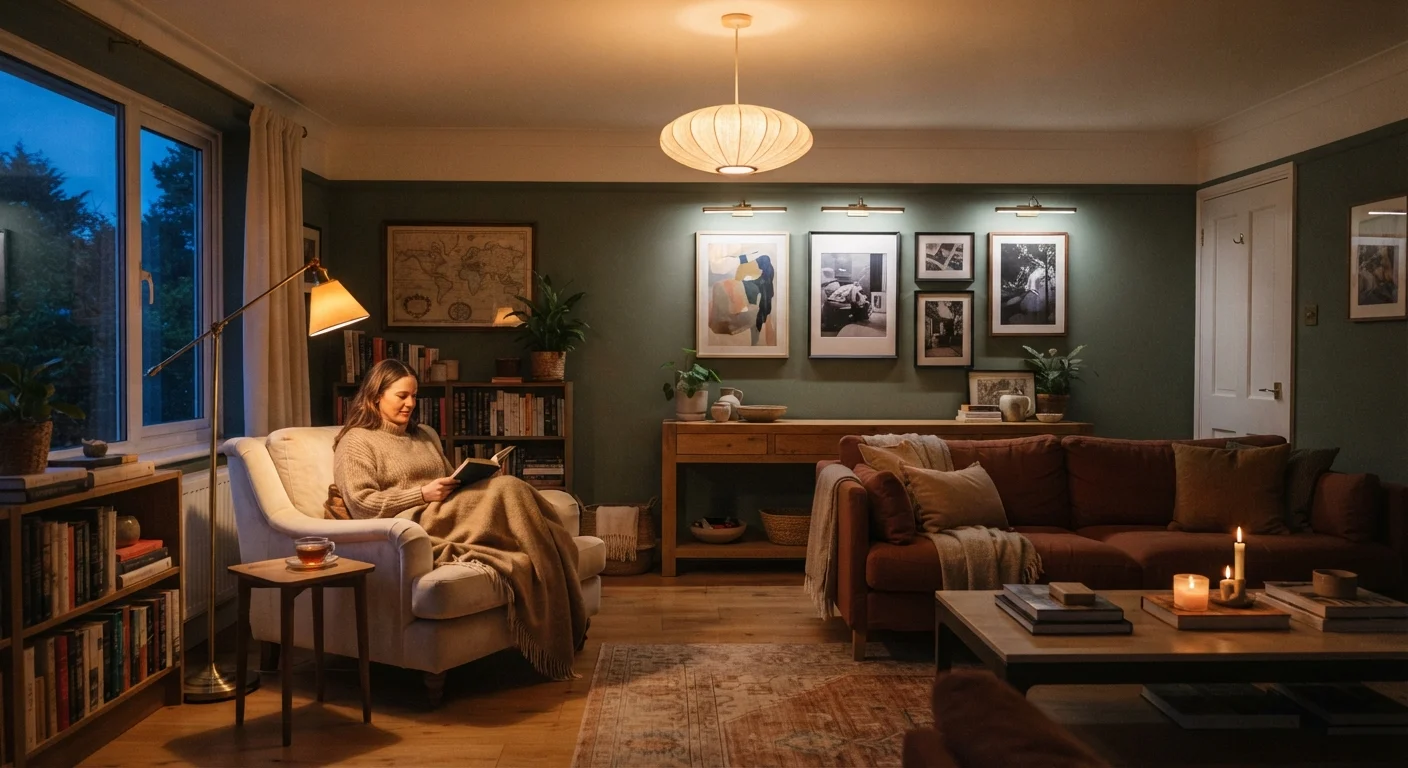
Why One Overhead Light Is Never Enough
Most rooms ship with a single ceiling fixture - and that single source is the root cause of flat, uninspiring spaces. When light comes from only one direction and height, it casts uniform shadows, flattens textures, and makes a room feel more like a waiting room than a home. Layered lighting solves this by distributing light at multiple heights and from multiple sources, each doing a specific job.
The three-layer framework - ambient (general fill light), task (focused working light), and accent (decorative or directional highlight) - isn't interior designer jargon. It's a functional system you can build incrementally, affordably, and without touching a wire. See our room styling guide for how lighting fits into a broader makeover approach.
The Three Layers Explained
Ambient light is your base layer - it fills the room and sets the overall brightness. This is usually your ceiling fixture, recessed cans, or a semi-flush mount. The mistake most people make is stopping here. To improve ambient light without rewiring, swap bulbs for a warmer color temperature (2700K-3000K for living spaces) and add a dimmer switch if your fixture allows. For a full breakdown of color temperature and lumens by room type, see LED lighting room-by-room guide.
Task light is targeted illumination where you actually do things - reading, cooking, applying makeup, working at a desk. A floor lamp beside a chair, under-cabinet strips in a kitchen, or a swing-arm lamp at a workspace all qualify. Task lighting should be brighter and cooler (3000K-4000K) than ambient, positioned to avoid glare on your work surface.
Accent light is the layer most DIYers skip, and skipping it is why rooms often feel unfinished. Accent lighting directs attention - at artwork, shelving, a textured wall, or architectural details. Picture lights, plug-in sconces, LED strip lights behind furniture, and battery-powered puck lights all work here. Budget-wise, this is also the highest-impact layer per dollar: a $15 LED strip behind a bookcase changes the feel of an entire wall.
Putting It Together Without an Electrician
The good news: the majority of layering work requires no new wiring. Plug-in pendants, cord-cover kits, and battery-powered fixtures let you add fixtures anywhere without a permit or a professional. For guidance on controls - including which dimmers are compatible with LED bulbs - check out lighting controls explained.
Work room by room, starting with the space you use most. Audit what's already there: identify where task and accent layers are missing, then fill gaps with plug-in or battery options before committing to hardwired changes. This approach keeps costs contained and lets you test placement before anything is permanent.
If you're also rethinking how your room handles natural light alongside artificial sources, natural vs. artificial light styling decisions covers how each source shapes your furniture placement and finish choices.
Common Mistakes That Undercut the Layers
Even with all three layers present, a few recurring errors can neutralize the effect. First, mismatched color temperatures: mixing a 6500K daylight bulb in the ceiling with 2700K warm lamps creates a jarring, disjointed look. Aim for consistent color temperature across all sources in a single room, with slight variation acceptable between ambient and task zones. Second, over-brightness: more lumens don't automatically equal better lighting. Layering works because different intensities coexist - not because everything is cranked up. Third, ignoring the floor level: table lamps and floor lamps placed at eye level when seated add warmth and intimacy that ceiling fixtures physically cannot replicate.
Lighting also interacts directly with color and texture. A warm accent light grazing a textured wall does more visual work than the same wattage pointed at a flat painted surface. For more on how texture and light reinforce each other, see layering textures for a cozy room.
Note: Any electrical work involving your home's wiring, circuit panel, or new hardwired fixtures should be handled by a licensed electrician. Always verify local permit requirements before making changes beyond simple bulb or plug-in fixture swaps.
The content on this site is for informational purposes only and is not a substitute for professional advice. Always consult a qualified professional for guidance specific to your situation.