

Why Hidden Moisture Is More Dangerous Than a Visible Leak
A dripping faucet is obvious - you fix it. But moisture working its way into a wall cavity operates silently, accumulating over days or weeks before any surface sign appears. By the time you notice discoloration or a soft spot, the damage is rarely confined to just that patch.
Drywall is made from a gypsum core sandwiched between paper facings. Both components absorb moisture readily, and once saturated, the gypsum crumbles and the paper becomes a ready food source for mold. The framing studs and any insulation behind the drywall face the same risk. Understanding what you're dealing with is the first step toward a repair that actually holds - and that starts with learning how to read the signs your walls are already giving you.
For a broader look at how wall and insulation systems can fail together, see our article on insulation failure warning signs.
The Key Warning Signs - and What Each One Means
No single sign is definitive on its own, but a cluster of the following symptoms should prompt a closer investigation:
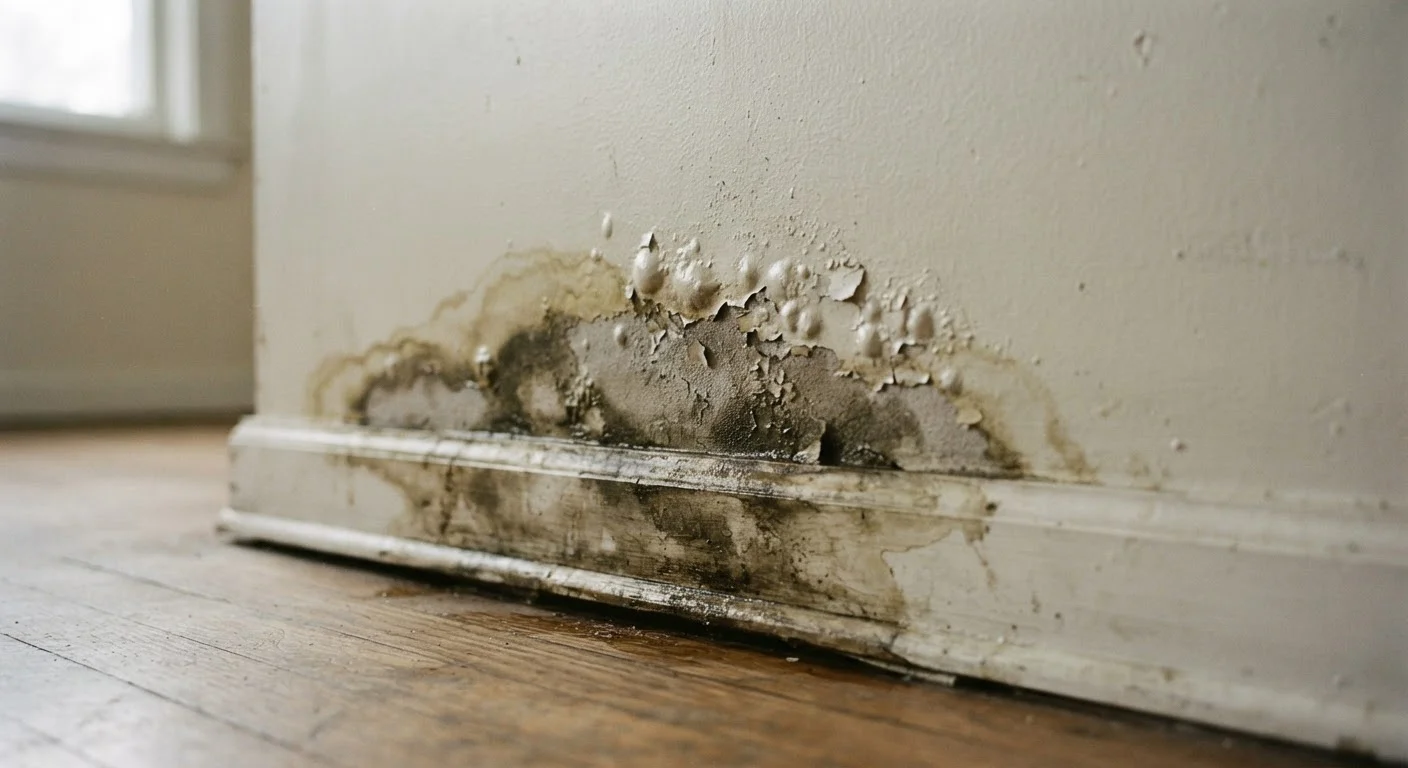
- Staining and discoloration: Yellowish-brown rings or streaks on painted drywall indicate water has reached the surface layer. Fresh stains tend to be darker at the edges; older stains may fade but leave a mineral residue. Multiple overlapping rings suggest a recurring or ongoing source.
- Soft or spongy texture: Press gently along the wall surface with your palm. Healthy drywall feels firm and unyielding. A soft, slightly springy response indicates the gypsum core has absorbed water and begun to break down. This is one of the most reliable physical indicators.
- Peeling or bubbling paint or wallpaper: Moisture vapor migrating through the wall breaks the bond between paint and substrate. Bubbling usually indicates an active or recent moisture event; widespread peeling can point to chronic humidity issues.
- Musty or earthy odor: A persistent musty smell in a room - especially one that's stronger near baseboards or a specific wall - is a strong indicator of mold or mildew growth in the wall cavity, even when surfaces appear intact.
- Baseboard separation or floor damage: When moisture pools at the base of a wall, the bottom plate and baseboards absorb it first. Gaps opening between the baseboard and the wall or floor, or softness in the adjacent flooring, suggest prolonged saturation at floor level. Flooring patterns can also be a diagnostic clue - see our guide on cupped and warped wood floors for more.
Surface Stains Can Be Misleading
A stain's location on the wall surface doesn't always correspond to where water first entered. Moisture travels along framing, insulation batts, and wiring before it pools and appears on drywall. Always investigate above and beyond the visible stain before concluding you've found the full extent of the problem.
Tracing the Source: Don't Skip This Step
Replacing damaged drywall without identifying the moisture source is one of the most common and costly mistakes a DIYer can make. The new material will fail just as the old did. Before touching any wall, spend time locating where the water is entering.
Common sources include:
- Plumbing leaks
- Supply lines and drain connections within walls can weep slowly for months. Compare the location of stains against the known routing of pipes in your floor plan.
- Roof or flashing failures
- Moisture appearing on upper walls or ceilings often traces back to deteriorated flashing around chimneys, vents, or skylights. Rain events that correlate with new staining are a strong clue.
- Condensation from HVAC
- Improperly insulated ducts or blocked condensate drain lines can release moisture into wall cavities over time, especially in humid climates.
- Exterior intrusion
- Failed caulk around windows, cracked siding, or grade issues that direct water toward the foundation can drive moisture horizontally into wall assemblies.
An inexpensive pin-type or non-invasive moisture meter can help you map the extent of wet material before you cut anything open - a worthwhile step before committing to repairs. For a structured approach to evaluating damage before starting work, the pre-repair damage assessment checklist offers transferable principles that apply equally to walls.
Map Before You Cut
Before opening any wall section, use a moisture meter to probe the surrounding area and mark the wet boundary with painter's tape. This prevents unnecessary demolition and gives you a clear picture of the full scope of damage before repairs begin.
When to DIY - and When to Call a Professional
Not all moisture damage is within safe DIY territory. Use these boundaries as a guide:
- DIY-appropriate: A small, isolated stain from a single leak that has been fully resolved, with no soft drywall, no visible mold, and a clearly identifiable source that has been repaired. Cosmetic refinishing after confirmed dry-out may be manageable for a confident DIYer.
- Consult a professional: Any situation involving active plumbing leaks, mold covering more than approximately 10 square feet (EPA guidance), damaged structural framing, or moisture that cannot be traced to a clear source. Mold remediation above minor thresholds typically requires specialized containment and disposal practices.
Once the source is fixed and the extent of damage is understood, your repair options become clearer. Our overview of drywall repair approaches can help you understand what each type of damage actually requires before you pick up a tool. And if you've had repeated wall problems, it's worth checking whether a deeper structural issue is at play - recurring drywall cracks are often linked to underlying movement or moisture cycles.
This article is for informational purposes only. Always verify local building codes, permit requirements, and consult licensed professionals for work involving plumbing, structural framing, or significant mold remediation.
Frequently Asked Questions
The most common signs are soft or spongy patches when you press the wall, yellowish-brown water stains, peeling or bubbling paint, and a persistent musty smell. Baseboards pulling away from the wall can also signal prolonged moisture exposure beneath the surface.
Not always, but mold can develop within 24-48 hours in the right conditions. If drywall was saturated and then dried out, mold may already be present even if the wall now feels firm. A visual inspection after opening the wall is the only reliable way to confirm.
Minor damage - such as a small stained area from a one-time leak that has been fully resolved - can often be addressed by a confident DIYer. However, any repair involving active leaks, significant mold, structural framing damage, or plumbing connections should involve a licensed professional.
Trace the stain's location relative to plumbing lines, roof areas, and exterior walls. Moisture meters can help map wet areas without cutting. Check for condensation from HVAC ducts and inspect caulk and flashing at windows and roof penetrations above the stained area.
Permit requirements vary by jurisdiction, but work that involves opening walls to access plumbing, repairing structural framing, or conducting mold remediation above a certain square footage often requires a permit or licensed contractor. Always verify with your local building department before starting.
Any drywall that feels soft, shows active mold, or has a compromised paper facing should be replaced rather than dried and repainted. The surrounding area should also be inspected carefully, as moisture can wick further than the visible stain.
The content on this site is for informational purposes only and is not a substitute for professional advice. Always consult a qualified professional for guidance specific to your situation.