

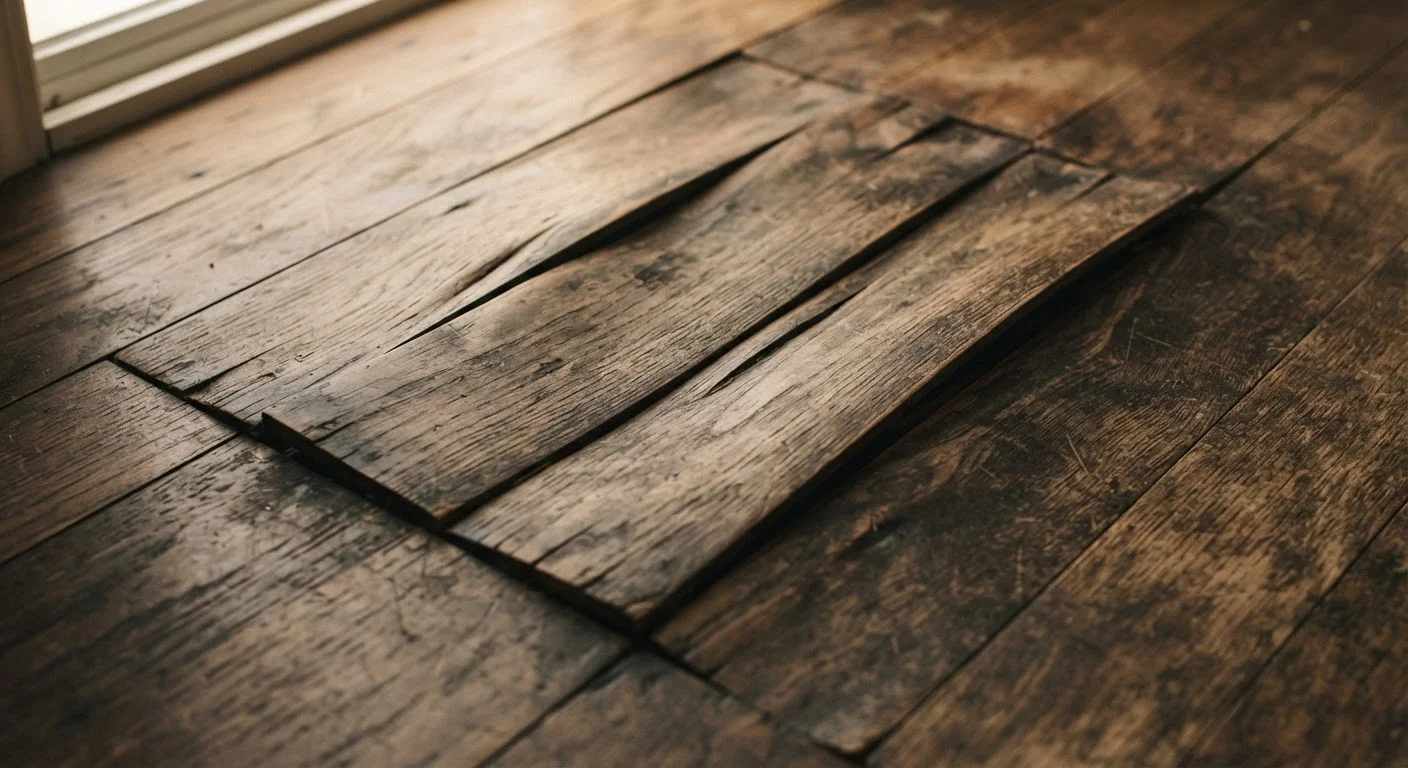
Why the Shape of the Damage Matters
When a wood floor starts to look uneven, the instinct is often to reach for a sander or start pulling up boards. But the specific shape of the distortion - the direction it curves, where it lifts, how many boards are affected - is actually a diagnostic tool. Each pattern is wood communicating a specific stress condition.
Understanding what you're looking at before you act is essential. As part of a complete flooring repair approach, identifying the deformation type is step one - because the correct fix depends entirely on the correct diagnosis. And the most expensive mistake you can make is repairing the visible damage while leaving the root cause untouched.
It's also worth understanding how the subfloor and surface floor interact, since many deformation problems originate below the boards you can see.
Cupping: Edges Up, Center Down
Cupping is one of the most common wood floor deformations. The board's edges rise above its center, giving each plank a subtle concave or trough-like shape across its width. Run your hand across the boards and you'll feel a washboard texture.
What it tells you: The bottom of the board contains more moisture than the top. This moisture differential causes the underside to expand more than the face, pulling the edges upward. Common sources include a damp crawl space, inadequate vapor barrier, concrete subfloor off-gassing moisture, or poor HVAC humidity control - especially in humid climates.
Let the Floor Dry Before You Sand
One of the most costly cupping repair mistakes is sanding the floor flat while it still holds excess moisture. The surface may look level temporarily, but as the wood dries, crowning will develop - and you'll have a new problem caused by the repair itself. Always resolve the moisture source, allow the floor to re-equalize for several weeks, then re-evaluate before any sanding.
Mild cupping caught early may partially self-correct once the moisture source is resolved and the floor is allowed to dry slowly with consistent indoor humidity. Rushing the drying process with heaters can cause cracking. Patience here pays off.
Before pursuing any repair, assess the full scope of the damage to avoid wasting materials on boards that aren't salvageable.
Crowning: Center Up, Edges Down
Crowning is the mirror image of cupping - the center of each board is raised higher than its edges. It can look similar at first glance, but the direction of the curve is reversed.
What it tells you: Crowning usually signals one of two things. First, surface moisture - from a spill, excessive mopping, or a leaking appliance - has caused the top of the board to expand. Second, and very commonly, it results from sanding cupped floors before they've fully dried. When a cupped board is sanded flat while still holding moisture in the center, the edges were already compressed. As the floor dries, those edges try to expand back - and the result is crowning.
This is why surface repairs to hardwood should never begin until moisture conditions are fully stabilized. Crowning caused by sanding error is especially frustrating because it's entirely preventable. If it's happened, allow the floor to fully re-equalize before evaluating whether sanding can correct it.
Crowning After Sanding Is Very Common
If your floor was professionally or DIY-sanded after cupping and now shows crowning, this is a widely documented outcome rather than a freak occurrence. The wood's mechanical memory - the way compression-set edges try to return to their original state as moisture leaves - makes this almost inevitable when sanding happens too early. The lesson applies to any future floor repair involving sanding.
Buckling: The Most Severe Warning Sign
Buckling is unmistakable - boards physically lift off the subfloor, sometimes rising an inch or more. It's alarming to see and, unlike cupping or crowning, rarely resolves on its own.
What it tells you: Buckling happens when wood has absorbed so much moisture that it expands beyond the space available. This can result from flooding, a burst pipe, slab moisture intrusion, or chronic humidity that was never addressed. The boards have nowhere to go but up.
Immediate steps: Stop the water source if one is active. Ventilate the area and use dehumidifiers cautiously. Do not walk on severely buckled boards - they represent a genuine trip hazard. Because buckling suggests moisture has likely reached the subfloor, and because mold can develop within 24 to 48 hours of water exposure, professional evaluation is strongly recommended before any DIY repair begins.
Moisture damage doesn't stay contained to floors. If you're seeing buckling near walls, it's worth checking for moisture damage behind the drywall as well - the two problems frequently share the same source.
35-55%
Ideal indoor relative humidity for wood floor stability
Wood flooring industry guidelines generally recommend maintaining indoor relative humidity within this range to minimize seasonal expansion and contraction.
24-48 hrs
Window before mold risk significantly increases after water exposure
According to the EPA, mold can begin to grow on wet building materials within 24 to 48 hours of water exposure, underscoring the urgency of addressing flooding or leaks promptly.
~6-9%
Target moisture content for most installed hardwood flooring
Most hardwood flooring installers reference a target wood moisture content of roughly 6-9% for interior installations, though the ideal range varies by region and wood species.
Reading the Pattern Before You Repair
Once you've identified which pattern you're dealing with, the repair path becomes clearer. The common thread across all three conditions is this: fix the moisture source first, always. No cosmetic repair - sanding, filling, or board replacement - will hold if the conditions causing the distortion are still present.
Use a moisture meter to compare readings between affected and unaffected boards. Check for plumbing leaks above and below. Evaluate crawl space or basement conditions if your subfloor is not on a slab. Measure indoor relative humidity and aim to keep it between 35% and 55% year-round, which is within the general range wood flooring manufacturers typically recommend for stability.
After the source is confirmed and corrected, give the floor time to acclimate - this can take several weeks. Only then should you evaluate how much self-correction has occurred and what repair remains. Some boards will recover; others will need replacement. Either way, you'll be making that decision from a position of real understanding rather than guesswork.
This article is for informational purposes only. Flooring repair outcomes vary based on wood species, installation method, subfloor condition, and moisture levels. Consult a licensed flooring or water damage professional for severe or structurally compromised situations. Always verify local building codes and permit requirements before undertaking significant floor repairs.
Frequently Asked Questions
Sometimes. If the moisture source is removed early enough and the cupping is mild, boards may flatten as they dry and re-equalize. However, this process can take weeks and isn't guaranteed. Severely cupped boards typically retain some distortion and may need replacement.
Cupping means the board edges are higher than the center; crowning is the opposite, with the center raised above the edges. Crowning often results from surface moisture or from sanding cupped boards before they have fully dried.
Raised boards create a trip hazard and should be addressed promptly. Avoid the area if the lift is significant. Buckling also points to a serious moisture event - like a plumbing leak or flooding - that needs immediate professional evaluation.
Start by checking plumbing fixtures above and below the affected area, inspecting the subfloor for dampness, and measuring indoor humidity levels. A pin-type moisture meter can help you compare readings across boards to narrow the source.
Buckling almost always involves structural-level moisture damage and frequently requires professional assessment. The subfloor may be compromised, and replacement decisions should account for any mold or rot risk. Always consult a qualified flooring or water damage professional for severe cases.
No - and doing so is one of the most common DIY mistakes. Sanding cupped boards while they're still holding moisture will leave them crowned once they dry out. Always resolve the moisture source and let floors fully stabilize before any sanding.
The content on this site is for informational purposes only and is not a substitute for professional advice. Always consult a qualified professional for guidance specific to your situation.