

Why a Patch Works - and When It Doesn't
A carpet patch repair is one of the most cost-effective floor fixes available, provided the surrounding carpet is structurally sound and the damage is contained to a small area. Burns, pet stains that have set into fibers, crushing from heavy furniture, or small tears are all good candidates. The goal is an undetectable repair - and that's genuinely achievable with careful technique.
However, patching has limits. If the carpet is heavily worn throughout the room, a patch cut from a less-trafficked area will look noticeably fresher. Similarly, patterned carpets require precise repeat matching that raises the difficulty level considerably. For a broader perspective on planning floor repairs across material types, the comprehensive flooring repair overview covers what to consider before committing to any repair strategy.
Assess the Damage First
Before cutting anything, confirm the damage is surface-level and not caused by a moisture problem, mold, or a structural subfloor issue. Patching over an active moisture source will cause the repair to fail and may create a health hazard. See the pre-repair damage assessment guide before picking up any tools.
Just as matching texture is central to a successful carpet repair, the same principle applies when fixing walls - see how the textured wall finish matching guide approaches a parallel challenge for drywall surfaces.
Sourcing and Preparing Your Patch Material
The quality of your patch is determined almost entirely by how well your donor carpet matches the installed floor. A leftover remnant from installation is ideal. If none exists, harvesting a piece from inside a closet - replacing it with a cheaper piece of remnant - is a well-established trade trick that keeps the visible areas perfectly consistent.
When sourcing from a new remnant, bring a small cutting from your existing carpet to compare under natural light. Look at pile height, fiber density, texture, and color from multiple angles. Even a slight color-lot difference will be visible after installation. For more on managing color consistency across a repair, the guide on keeping repaired floors looking consistent offers practical matching strategies that apply to carpet as much as to hard flooring.
Use a Closet as Your Donor Source
The best patch material is carpet pulled from an inconspicuous spot - inside a closet corner, behind a door, or under a large fixed appliance. This donor piece will share the exact same dye lot, texture, and wear level as the surrounding floor, making a seamless blend far easier to achieve than with any new remnant.
Before cutting into your floor, refer to the floor damage assessment checklist to confirm you've identified the full scope and root cause of the problem. And if you're also dealing with hard surface damage elsewhere in your home, the hardwood floor patching guide covers a related set of techniques for wood surfaces.
Tools and Materials
A successful carpet patch doesn't require specialized contractor equipment, but a few key tools make the difference between a lasting repair and one that lifts or shows a ridge within weeks.
Carpet Knife / Utility Knife
Cuts cleanly through carpet backing without fraying pile fibers when a sharp blade is used.
Metal Straightedge or Ruler
Guides straight cuts so both the patch and the void have matching, flush edges.
Hot-Melt Seam Tape
Bonds the patch to the subfloor and bridges the seam between old and new carpet sections.
Seam Iron (Carpet Iron)
Activates the adhesive in seam tape with controlled heat to create a lasting bond.
Donor Carpet Piece
Provides matching pile, color, and texture for an invisible repair.
Knee Kicker
Stretches and tucks carpet edges snugly when the patch area is near a wall or transition strip.
What you will need
Gather everything before you begin. Stopping mid-repair to find a missing tool risks the seam tape cooling unevenly or the patch shifting before it bonds.
Step-by-Step Patch Repair
Identify and mark the damaged area
Use a marker or chalk to outline the damaged section in a clean geometric shape - a square or rectangle is easiest to match precisely. Keep the outline tight around the damage but large enough to capture all compromised fibers. Avoid irregular shapes; straight edges will produce tighter seams.
Note the pile direction before cutting
Run your hand across the carpet in multiple directions. The pile will feel smooth when stroked one way and rough in the opposite direction. Mark an arrow on a piece of tape and stick it on the edge of your outlined area to record which way the pile flows. You will replicate this exactly on the donor piece.
Cut out the damaged section
Using your metal straightedge as a guide, cut along your outline with a sharp carpet knife. Apply steady, firm pressure and cut through the backing in one clean pass per side. Avoid sawing back and forth, which frays the edges. Lift the cut section out cleanly.
Cut the patch from the donor carpet
Place the removed damaged section face-down on the donor carpet, aligning pile direction carefully using your arrow reference. Trace around it precisely and cut the donor piece to match. Test-fit the patch in the void - it should sit flush with no gaps and no overlap.
Place seam tape and set the patch
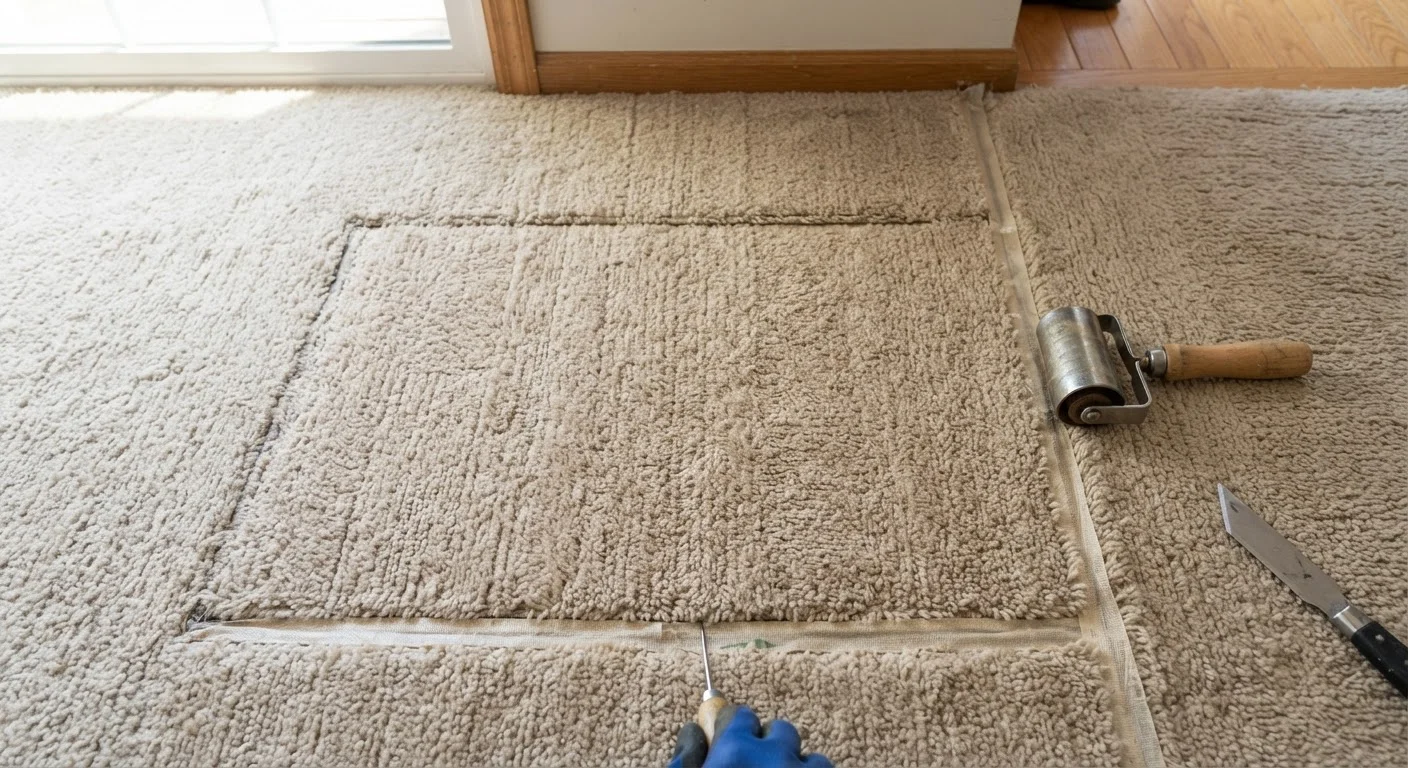
Cut strips of hot-melt seam tape to run beneath each seam edge. Slip the tape adhesive-side up under the existing carpet's edge so it bridges the gap between old carpet and patch. Position the patch in the void and lower it onto the tape without pressing down yet.
Activate the seam tape with a carpet iron
Slide a heated seam iron slowly under the carpet along each taped seam. As the adhesive melts, press each edge firmly down onto the tape and hold for several seconds. Work one side at a time. Allow the adhesive to cool fully - typically 5-10 minutes - before walking on the repair.
Blend and trim the seam edges
Once the adhesive has set, use scissors or a seam roller to gently blend pile fibers across the seam line. Trim any tufts that stand noticeably higher than surrounding pile using small scissors. Work in the direction of the pile and step back frequently to check the repair from different angles and lighting conditions.
Note: This guide is intended for cosmetic carpet repairs in residential settings. If your repair involves large areas, structural subfloor damage, or moisture intrusion, consult a licensed flooring professional. Always verify local building codes if your situation involves safety-relevant floor conditions.
The content on this site is for informational purposes only and is not a substitute for professional advice. Always consult a qualified professional for guidance specific to your situation.