

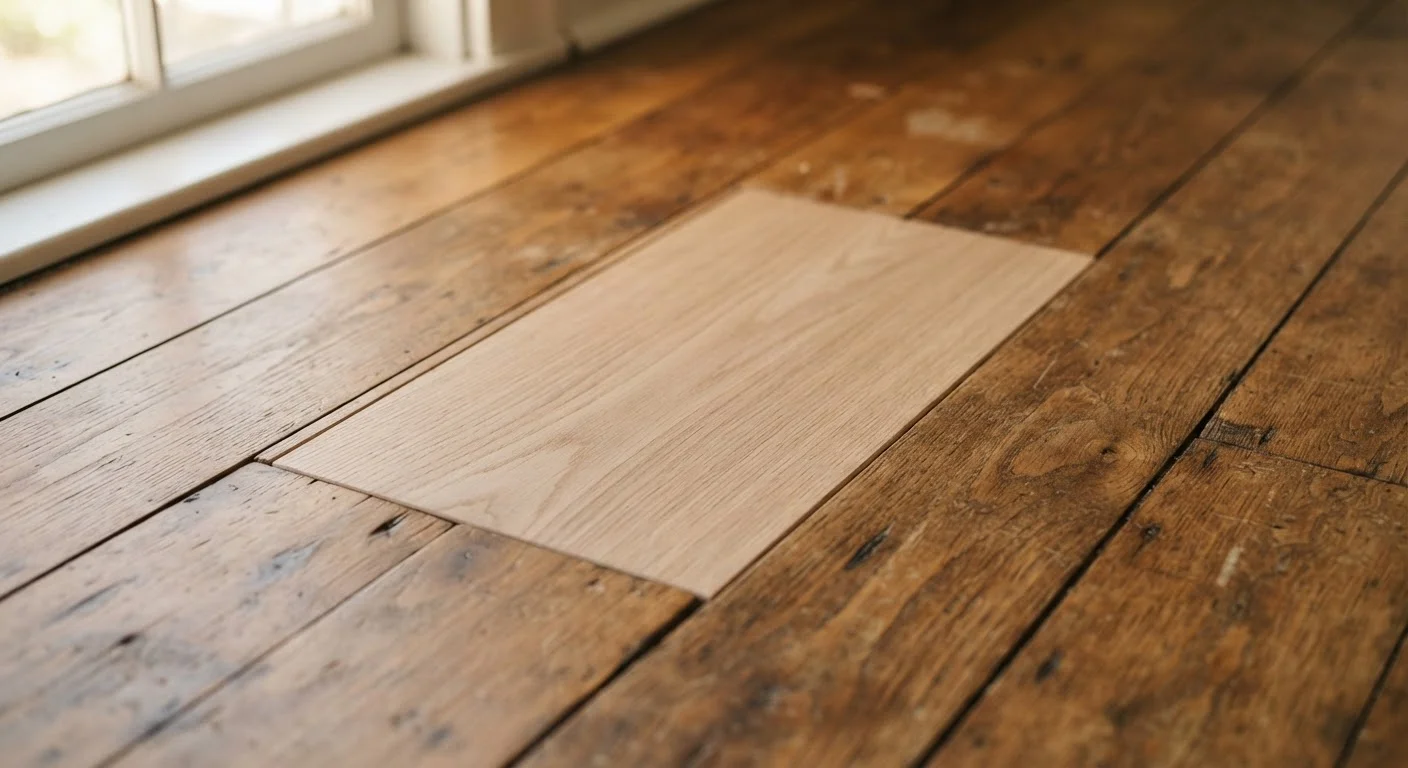
Why Consistency Is the Hardest Part of Any Floor Repair
A structurally sound floor repair can still look obvious if the colour, sheen, or texture doesn't align with the surrounding surface. That mismatch is often more noticeable than the original damage - and it's the part most DIYers underestimate going in.
Floors change over time. Foot traffic buffs finish unevenly, UV light slowly bleaches pigment, and wood grain darkens with age and absorbed oils. A fresh repair, by contrast, starts from scratch. Understanding this gap - and planning for it - is the first step toward a repair that disappears into the floor rather than announcing itself. For a broader overview of repair planning across material types, see this complete flooring repair guide.
Stain and Colour Matching: Test Before You Commit
For wood floors, stain matching is rarely as simple as selecting the closest label on a can. The same stain formula can produce noticeably different results depending on wood species, grain density, how the surface was previously finished, and whether the wood has been sanded. Always test your chosen stain on a scrap piece of the same wood species, or in an inconspicuous area such as inside a closet, before applying it to the repair.
If you're working with engineered wood or vinyl plank, stain typically isn't the right tool. Instead, focus on sourcing a replacement plank that's as close to the original run as possible - ideally from leftover stock kept after installation. Manufacturers do update their product lines, so an exact match from a current production run is not guaranteed even within the same product name. Common floor repair myths often include the belief that colour-matched stains work identically on all wood types - they don't.
For tile floors, grout colour is frequently the element that betrays a repair. Grout darkens with age and absorbed residue. When replacing a tile, mix a small amount of the new grout and let it fully cure on a scrap surface before grouting the repair - cured colour is significantly different from wet colour, and comparing it to the surrounding grout while it's wet leads to poor decisions.
Matching Sheen: The Often-Overlooked Variable
Even a perfect colour match will stand out if the repaired section reflects light differently than the rest of the floor. Finish sheen is measured on a spectrum from flat/matte through satin and semi-gloss to high-gloss. Most residential hardwood floors fall in the satin to semi-gloss range, but this varies significantly by age, previous refinishing, and maintenance habits.
Before applying any finish to a repair, identify the existing sheen level by observing how light reflects off the floor at a low angle. If you have the original finish product or know the brand used during installation, that's valuable reference information. When in doubt, lean toward a slightly lower sheen - a touch more matte blends more forgivingly than a touch more gloss, because excess shine is more visually apparent.
Feathering Finish Edges Makes a Big Difference
When applying finish to a repaired section, don't stop precisely at the edge of the new material. Extend the final coat 2-3 inches onto the surrounding floor using light, tapering strokes. This gradual transition reduces the sharp reflection line that otherwise forms where old and new finish meet. It's a small technique adjustment that significantly improves blending.
Apply finish in thin coats and feather the edges of the repaired section outward slightly to soften the boundary with the surrounding floor. Abrupt finish edges will catch light and remain visible even when colour is correct.
Working With Ageing: Patience and Realistic Expectations
No repair on an aged floor will be completely invisible the day it's completed. This is worth stating plainly, because the expectation of an immediate perfect match leads to overcorrecting - adding too much stain, applying extra finish coats, or sanding surrounding areas unnecessarily, all of which can worsen the result.
UV exposure is the primary driver of floor colour change over time. Solid hardwood exposed to sunlight will gradually lighten or shift in tone, and a fresh patch that's slightly darker will often blend in as it receives the same light exposure. In some cases, repositioning area rugs temporarily to expose previously covered sections - or removing them from over the repaired area - can help even out UV-driven colour differences more quickly.
For hardwood repairs involving surface scratches and gouges, the patching hardwood floors guide covers material selection and surface prep in detail. When patching carpet sections, pile direction and texture also age together - a patch from a different dye lot will often blend more completely after several months of foot traffic. See carpet patch repair guidance for more on managing that process.
Practical Steps to Improve Your Odds of a Seamless Result
A few habits consistently separate repairs that blend from repairs that stand out:
Renters should approach colour-matching repairs with extra care - documenting the original condition and the repair process protects against liability disputes. The floor repair guide for renters outlines what's typically within tenant scope and what should be escalated to a landlord.
Matching finishes on floors shares key principles with wall repairs. If you've worked through a textured wall finish repair, many of the same test-first, feather-edges habits apply here.
This article provides general guidance for informational purposes only. Results vary based on floor material, age, condition, and individual technique. Always verify that your repair approach is appropriate for your specific flooring type, and consult a flooring professional when in doubt about structural repairs or finish compatibility.
The content on this site is for informational purposes only and is not a substitute for professional advice. Always consult a qualified professional for guidance specific to your situation.