

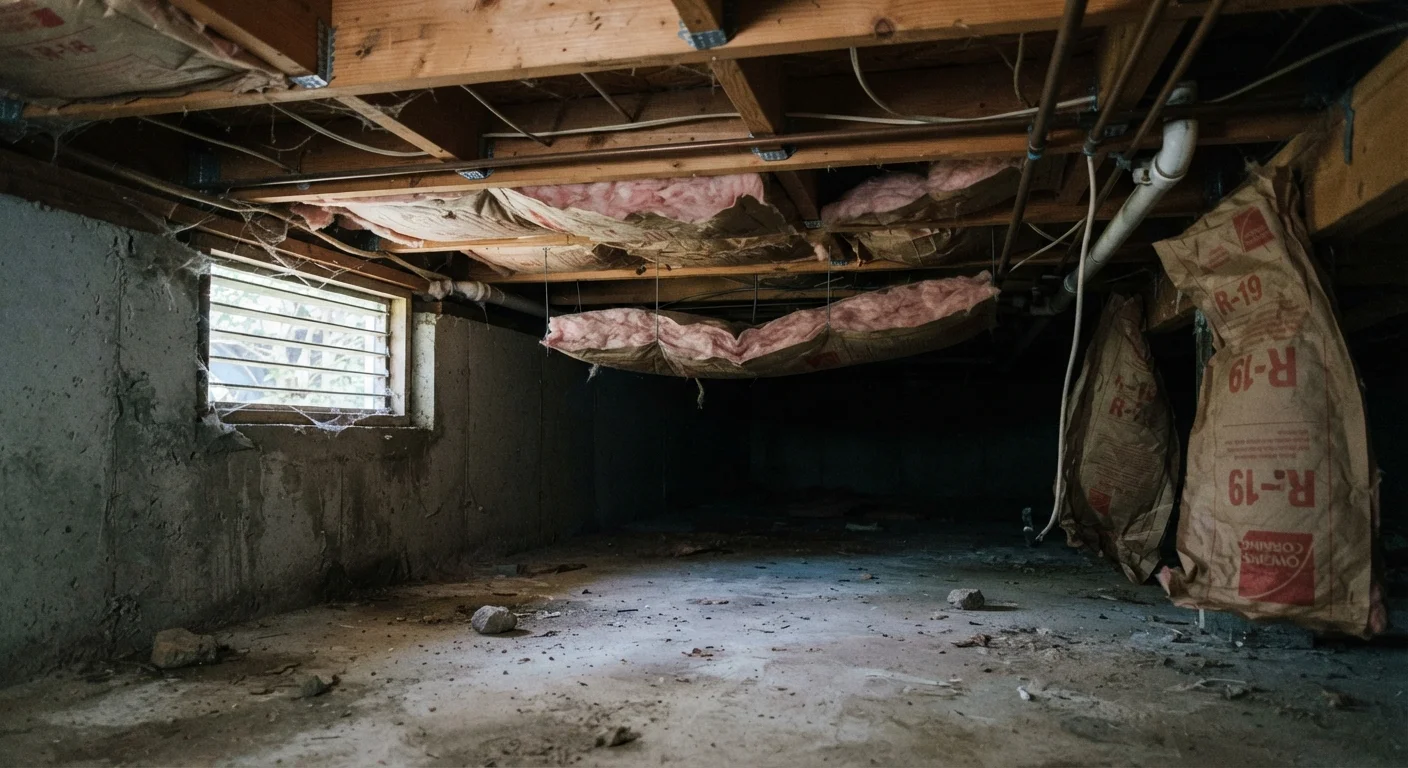
Why Crawl Spaces Get Ignored - and Why That's Costly
Crawl spaces sit out of sight and out of mind for most homeowners - and that invisibility has a real cost. Cold floors in winter, uneven room temperatures, and stubborn humidity problems frequently trace back to an uninsulated or poorly sealed crawl space. If those symptoms sound familiar, our guide to insulation failure warning signs can help you confirm the diagnosis.
The crawl space is essentially a buffer zone between the cold or damp ground and your living area. Without proper insulation and moisture control, that zone becomes a conduit for heat loss in winter and humidity in summer. The floor assembly above - your subfloor, flooring finish, and any plumbing or ductwork running through the space - suffers accordingly.
Crawl spaces are also among the most impactful zones to address. Our overview of high-priority insulation zones places the crawl space alongside rim joists and attics as areas that reward attention with meaningful efficiency gains.
Two Strategies: Floor Insulation vs. Full Encapsulation
Before choosing materials, you need to decide which approach fits your crawl space. The two main strategies work very differently and are not interchangeable.
Strategy 1: Insulating the Floor Above (Vented Crawl Space)
In this approach, the crawl space itself remains open to outside air through foundation vents, and insulation is installed between the floor joists overhead - directly beneath your living area. Fiberglass batt insulation is the most common material here, cut to fit snugly between joists and held in place with wire supports or insulation hangers. The goal is to keep heat inside the conditioned living space above.
This method works but has a significant limitation: the crawl space air itself remains cold and potentially humid, meaning any ductwork, pipes, or subfloor elements in the space are still exposed to harsh conditions.
Strategy 2: Crawl Space Encapsulation (Conditioned Crawl Space)
Encapsulation treats the crawl space as part of the home's conditioned envelope. Foundation vents are sealed, the walls and floor of the crawl space are lined with rigid foam insulation and a heavy-duty vapor barrier, and the space is kept at a controlled temperature and humidity level. This is a more comprehensive - and more expensive - upgrade, but it protects pipes, ductwork, and the structure itself far more effectively.
If you're unsure which approach is right for your home, a room-by-room insulation audit can help you evaluate what's actually happening in your space before committing to either path.
Encapsulation Often Requires a Permit
Sealing foundation vents and converting a vented crawl space to a conditioned one changes how the space functions structurally and in terms of moisture management. Many jurisdictions classify this as a building alteration requiring a permit and inspection. Always check with your local building department before proceeding with encapsulation, and strongly consider hiring a licensed contractor familiar with local code requirements.
What You'll Need
Gather your materials and protective gear before entering the crawl space. Working in a confined, potentially damp area requires care.
What you will need
N95 or P100 respirator
Protects lungs from fiberglass particles and crawl space dust during installation.
Safety glasses and work gloves
Shields eyes and skin from fiberglass irritants and debris.
Bright flashlight or headlamp
Illuminates the crawl space for inspection and installation work.
Tape measure and utility knife
Used to measure joist cavities and cut insulation batts to fit precisely.
Wire insulation supports (insulation rods)
Holds insulation batts firmly against the subfloor to prevent sagging.
Canned spray foam and caulk
Seals gaps around penetrations and rim joist edges before insulation is added.
Polyethylene sheeting (6-mil or thicker)
Ground-cover vapor barrier that blocks ground moisture from entering the crawl space.
Knee pads and protective coveralls
Provides comfort and protection when moving through a confined crawl space.
Step-by-Step: Insulating Your Crawl Space Floor
These steps apply to the vented crawl space floor-insulation approach, which is the more accessible DIY option. Encapsulation - particularly sealing vents and conditioning the space - often warrants professional involvement due to building code requirements and moisture management complexity.
Inspect the crawl space before touching any insulation
Put on your PPE and do a thorough walk-through with a bright flashlight. Look for standing water, active leaks, mold growth, wood rot, pest damage, or damaged ductwork. Any of these conditions must be resolved before insulation work begins.
Install or repair the ground-cover vapor barrier
Lay heavy-duty polyethylene sheeting (6-mil minimum) across the entire crawl space floor. Overlap seams by at least 12 inches and use a compatible tape to seal them. Run the edges up the foundation wall by 6 inches and secure with adhesive or mechanical fasteners.
Seal air leaks in the floor assembly
Before adding insulation, use canned spray foam or caulk to seal gaps around pipes, wires, and any penetrations through the subfloor. Pay special attention to the rim joist - the framing board that sits on top of the foundation wall - as this is a major air-leakage point. Cut rigid foam to fit rim joist bays and seal edges with spray foam.
Measure and cut insulation batts to fit between joists
Measure the joist spacing (typically 16 or 24 inches on center) and the depth of the joist cavity. Cut fiberglass batts to fit snugly - the insulation should press firmly against the subfloor above without gaps at the sides or ends. Use a straightedge and utility knife for clean cuts.
Install and secure the insulation batts
Friction-fit each batt into the joist bay, pressing it up firmly against the subfloor. Secure with wire insulation supports (also called tiger claws or insulation rods) spaced every 18-24 inches to prevent batts from sagging over time. Sagging insulation loses contact with the floor above and dramatically reduces effectiveness.
Verify coverage and check for gaps
Do a final pass through the crawl space looking for missed bays, gaps at the edges, or areas where batts have shifted. Even small gaps disproportionately undermine the overall thermal performance. Any areas around pipes or irregular framing may need small cut pieces to fill in.
For comparison, attic insulation follows a similar logic of air sealing first and then adding insulation layers. See our guide to insulating a draughty attic for a parallel process applied overhead.
Moisture Control: The Step Most DIYers Skip
Insulation alone cannot fix a crawl space with a moisture problem - it will actually make it worse by trapping dampness against wood framing. A ground-cover vapor barrier (typically a 6-mil or thicker polyethylene sheeting) laid across the crawl space floor is essential in vented crawl spaces. Overlap seams by at least 12 inches and tape them; run the sheeting up the foundation walls and secure it.
It's worth separating fact from fiction here: vapor barriers are not always required everywhere, and thicker isn't always better. Our piece on insulation myths costing homeowners money addresses these common misconceptions in detail.
Check Humidity Before and After
An inexpensive hygrometer placed in the crawl space lets you track relative humidity over time. A well-managed crawl space should stay below 60% relative humidity. If levels remain elevated after you've installed a vapor barrier and insulation, the space may need a dehumidifier or improved drainage - not more insulation.
This article is for informational purposes only. Crawl space work can involve moisture, mold, structural elements, and local building codes. Always verify requirements with your local building authority and consult a licensed contractor when conditions are beyond straightforward insulation installation.
The content on this site is for informational purposes only and is not a substitute for professional advice. Always consult a qualified professional for guidance specific to your situation.