

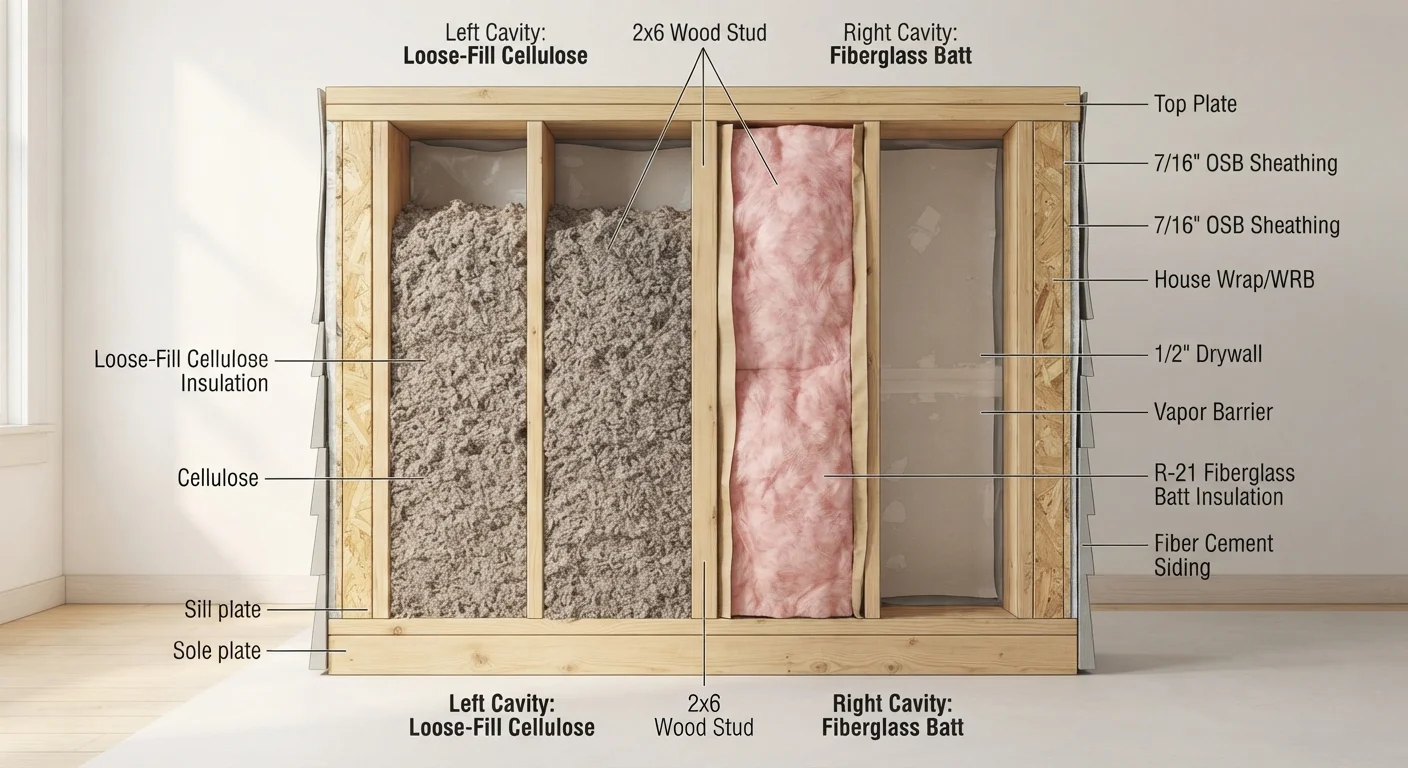
Option A
Loose-Fill (Blown-In) Insulation
The minimally invasive, cavity-conforming retrofit solution.
Best for: Finished walls where opening drywall is not an option and cavity shapes are irregular.
Option B
Batt Insulation (Cut-and-Cobble)
The familiar, hands-on approach suited to open or accessible wall cavities.
Best for: Walls already open for renovation or where patching drywall is planned anyway.
Why Retrofitting Existing Walls Is Uniquely Challenging
Adding insulation to an attic or crawl space is relatively straightforward - those spaces are accessible. Existing walls are another matter entirely. Studs, drywall, wiring, blocking, and fire-stops all occupy the cavity, and opening a finished wall means significant repair work. That's why choosing the right retrofit method matters before you pick up a single tool.
The two main contenders for existing wall retrofits are loose-fill (blown-in) insulation and batt insulation installed using the cut-and-cobble method. Each takes a fundamentally different approach to the same problem: getting insulating material into a closed or semi-closed cavity. Understanding the trade-offs helps you match the method to your specific wall conditions, budget, and skill level. For a broader look at how these fit among all insulation options, see a comparison of batts, blown-in, and rigid boards.
How Each Method Works
Loose-fill insulation - typically cellulose or fiberglass - is blown into wall cavities through small holes (usually 1.5-2 inches in diameter) drilled through the exterior siding or interior drywall. A blowing machine forces the material in under controlled pressure, filling the cavity from the bottom up. Once complete, the holes are plugged and patched. Because the material is granular or fibrous, it conforms to irregular shapes and flows around obstructions.
Cut-and-cobble batt insulation involves removing drywall panels to expose cavities, then cutting standard fiberglass or mineral wool batts to fit around pipes, wiring, and blocking. Pieces are friction-fit into place before the wall is re-drywalled, taped, and finished. The name reflects exactly what you do: cut batt sections and cobble them together to fill the space.
| Criterion | Loose-Fill (Blown-In) | Batt (Cut-and-Cobble) |
|---|---|---|
| Wall access required | Small drilled holes only | Full drywall removal |
| Equipment needed | Blowing machine (rent or hire) | Utility knife, stapler |
| Cavity coverage quality | Excellent - fills irregular shapes | Variable - gaps around obstructions |
| Typical R-value per inch | R-3.2 to R-3.8 (cellulose) | R-3.0 to R-4.3 (fiberglass/mineral wool) |
| DIY skill level | Moderate - technique matters | Beginner to moderate |
| Best scenario | Finished, occupied walls | Open or gutted walls |
| Repair work after install | Patch small holes | Re-drywall, tape, and finish |
For a deeper look at how material types like cellulose, fiberglass, and mineral wool compare on R-value and moisture behavior, visit our insulation materials comparison.
Practical Considerations: Access, Equipment, and Air Sealing
The single biggest factor in choosing between these methods is wall access. If your walls are already open - say, you're gutting a room or repairing water damage - batts make straightforward sense. If your walls are fully finished and you want to avoid major drywall repair, blown-in is almost always the more practical path.
Loose-fill requires a blowing machine, which can often be rented from equipment suppliers or is sometimes included when you purchase enough material in bulk. Even so, operating the equipment correctly to avoid under- or over-filling cavities takes practice. Over-filled cavities can bow drywall; under-filled ones leave dead air pockets that reduce effectiveness. Some homeowners find the learning curve warrants hiring a professional for this step.
Cut-and-cobble demands careful fitting. Gaps around wiring, outlets, and blocking are a persistent problem - any space left unfilled becomes a thermal bridge or air pathway. Meticulous cutting and fitting is time-consuming but achievable with patience.
Critically, neither method substitutes for air sealing. Before any insulation goes in, seal penetrations, gaps around electrical boxes, and top and bottom plate gaps with caulk or spray foam. Insulation slows heat transfer; only air sealing stops air movement. Doing one without the other leaves meaningful efficiency on the table. The honest trade-offs of DIY insulation installation covers this distinction in detail.
Note: Wall insulation work may require a building permit in your jurisdiction, particularly if the wall assembly is being significantly altered. Check with your local building department before beginning any retrofit project.
Cost, R-Value, and Long-Term Performance
Neither method delivers dramatically superior R-value per inch when comparing equivalent materials - both cellulose loose-fill and fiberglass batts achieve roughly R-3 to R-4 per inch depending on density and product. The real performance difference comes from coverage quality. Loose-fill, when properly installed at the correct density, fills cavities more completely, reducing thermal bridging from voids. Poorly fitted batts can perform well below their rated R-value if gaps are left around obstructions.
On cost, batt material is generally less expensive per square foot, but the labor of drywall removal, reinstallation, and finishing can make the total project cost higher than blown-in when walls are already finished. Loose-fill has higher material and equipment costs but avoids significant drywall work, making it the more economical retrofit in most finished-wall scenarios.
For context on how these approaches compare to foam-based alternatives, spray foam vs. rigid board insulation offers a useful counterpoint - particularly if you're weighing whether to address walls or other building envelope areas first.
Dense-Pack Loose-Fill: A Critical Detail
When blown into wall cavities (as opposed to attics), loose-fill insulation must be installed at a higher density - called 'dense-pack' - to prevent the material from settling over time. Settling reduces the effective R-value and creates gaps at the top of the cavity. Always confirm the target density specification for wall applications with your material's technical data sheet, and use a density gauge or tube-and-fill method to verify proper installation.
For a side-by-side look at how all major insulation types stack up on cost and difficulty, see insulation types compared by R-value, cost, and installation difficulty.
The content on this site is for informational purposes only and is not a substitute for professional advice. Always consult a qualified professional for guidance specific to your situation.