

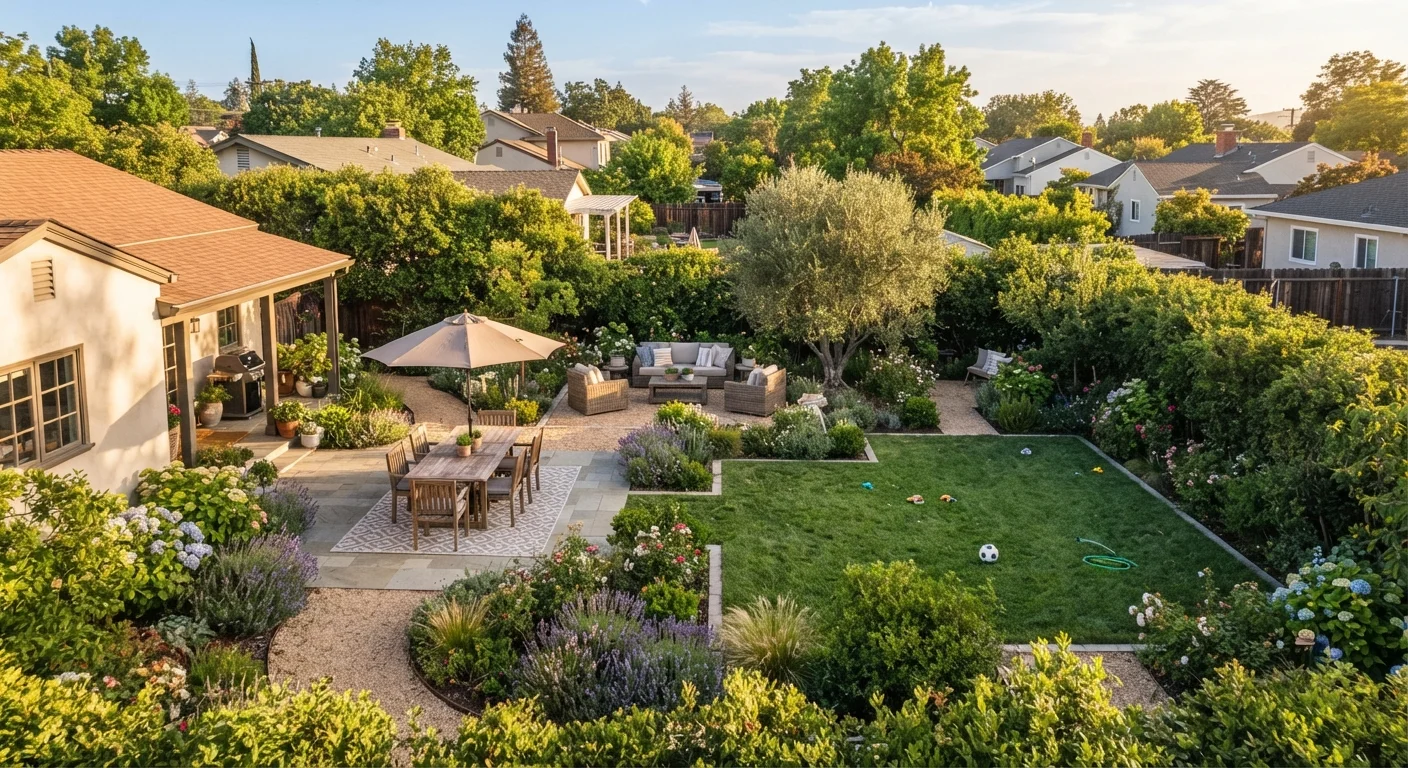
Why Zoning Your Yard Changes How You Use It
An undivided yard is easy to ignore. When every square foot serves no particular purpose, the space tends to default to one use - usually lawn maintenance - and the potential for outdoor living quietly goes unrealized. Zoning solves this by giving each area a clear identity, which in turn signals to your household and guests how each part of the yard is meant to be used.
Think of it the way interior designers approach open-plan rooms. Just as color and pattern define zones indoors, physical cues like flooring changes, low plantings, or furniture placement can carve a yard into distinct, purposeful spaces - without pouring a single footing or pulling a permit.
For homeowners working with compact yards, zoning is especially powerful. Our guide on designing small outdoor spaces explores how proportion and sightlines affect perceived size - principles that apply equally when you're dividing a larger yard into sections.
Sketch Before You Spend
A rough pencil diagram of your yard costs nothing and prevents costly mistakes. Even a five-minute sketch helps you spot when two planned zones are competing for the same space or when a path forces an awkward route. Revisit the sketch after each step before committing to any purchases or plantings.
Step-by-Step: Planning and Creating Your Outdoor Zones
Before moving a single piece of furniture or digging any beds, spend time observing the yard at different times of day. Note where shade falls in the afternoon, where foot traffic naturally clusters, and which areas get the most sun. This observational step shapes every decision that follows.
Map Your Yard and Identify Household Needs
Draw a rough overhead sketch of your yard - it doesn't need to be precise, just proportional. Mark fixed elements: the house, any existing trees, sheds, fences, and utility access points. Then list the activities your household actually wants to do outdoors: dining, lounging, playing, gardening, or storing equipment.
Prioritize the list. A family with young children will likely need a dedicated play area; a couple who entertains frequently will prioritize dining. Each household's list produces a different zoning layout, so this step shapes everything downstream.
Assign Zones to Specific Areas
Using your sketch, assign each activity to a region of the yard based on your sun/shade observations, proximity to the house, and natural traffic patterns. Place high-use areas like dining close to the house for easy access from the kitchen. Locate noisier or more active zones - play equipment, for example - farther from seating areas.
Keep utility and storage areas at the perimeter or edges, where they're accessible but not central. Leave a margin between zones so each feels complete rather than squeezed.
Define Zone Boundaries Without Building Walls
Physical boundaries don't require construction. Effective, low-cost options include:
- Low shrubs or ornamental grasses: Plant in rows or clusters to create soft, living dividers that grow denser over time.
- Surface material changes: Transition from lawn to gravel, or from concrete to decking, to signal a new zone underfoot.
- Raised planters or retaining borders: A row of planters doubles as a visual boundary and growing space.
- Furniture arrangement: A sofa and rug facing inward defines a lounging zone without any hard boundary at all.
Plan Traffic Flow Between Zones
Zones need to connect logically. Sketch the likely paths people will take: from the back door to the dining area, from dining to the lawn, from the lawn to a garden tap. Mark these paths and ensure no zone forces an awkward detour or requires crossing another zone entirely to reach a third.
Designate paths with stepping stones, a gravel strip, or simply mown grass slightly lower than surrounding turf. Even a subtle visual cue directs movement without fencing anyone in.
Furnish and Accessorize Each Zone Distinctly
Each zone should have furniture, lighting, or accessories that match its purpose and reinforce its identity. A dining zone needs a table, seating for your typical group size, and task lighting overhead. A lounging zone benefits from low seating, side tables, and ambient lighting. A play zone needs durable, easy-to-clean surfaces and minimal fragile elements nearby.
Using a consistent color palette - even just repeating one accent color across cushions or planters - ties separate zones together visually so the yard reads as one designed space rather than disconnected areas.
Once your zones are established, think carefully about the transitions between them. A clear path - even just stepping stones or a strip of gravel - signals movement from one area to the next and prevents zones from bleeding into each other visually. For ideas on making each zone perform across seasons, see our seasonal outdoor living guide, which covers weatherproofing and readying each area throughout the year.
When you're ready to furnish and entertain, practical outdoor entertaining setups offers layout ideas suited to real backyards - not showroom ideals.
Common Zoning Mistakes to Avoid
The most frequent error is over-zoning a space - trying to fit five distinct areas into a yard that realistically supports two or three. Each zone needs enough room to function without feeling cramped. A dining area, for example, typically needs at least 10 feet by 10 feet to seat four people comfortably with chairs pulled out.
Another common misstep is ignoring utility zones entirely. Storage for garden tools, a composting area, or a bin enclosure all need a home. Tucking these behind a trellis or at the perimeter keeps them out of sightlines without pretending they don't exist. If you're also organizing a garage that backs onto the yard, applying the same zone logic there can create a seamless workflow - our guide to garage storage zones breaks down that process in detail.
Finally, resist the urge to use too many different materials. Switching between brick pavers, concrete, decking, and gravel in a small yard creates visual noise. Limiting yourself to two or three complementary surface materials keeps the overall space feeling intentional rather than patchwork. The fundamentals of gardening can also help when you're choosing plants to define borders - knowing growth habits and maintenance needs prevents a decorative hedge from becoming an overgrown problem.
The content on this site is for informational purposes only and is not a substitute for professional advice. Always consult a qualified professional for guidance specific to your situation.